"Marta Randall" / 2025-06-20 a month ago / 未收藏/ LogRocket - Medium/
发送到 kindle
Jyoti Memom shares how trust is not only a value proposition for Bread Financial, but a pillar of what drives the product and decisions.
The post Leader Spotlight: Balancing trust and speed in digital banking, with Jyoti Menon appeared first on LogRocket Blog.
The post Leader Spotlight: Balancing trust and speed in digital banking, with Jyoti Menon appeared first on LogRocket Blog.
"Emmanuel John" / 2025-06-19 a month ago / 未收藏/ LogRocket - Medium/
发送到 kindle
Explore how to use Google’s new experimental Interest Invoker API for delays, popovers, and smarter hover UX.
The post How to use the Interest Invoker API for better, more accessible UX appeared first on LogRocket Blog.
The post How to use the Interest Invoker API for better, more accessible UX appeared first on LogRocket Blog.
"Kayode Adeniyi" / 2025-06-19 a month ago / 未收藏/ LogRocket - Medium/
发送到 kindle
Agile isn’t broken — it’s just being misused. Learn how to reset your rituals, refocus on outcomes, and bring meaning back to your process.
The post How agile became a checkbox exercise, and how to get unstuck appeared first on LogRocket Blog.
The post How agile became a checkbox exercise, and how to get unstuck appeared first on LogRocket Blog.
"Isaac Okoro" / 2025-06-19 a month ago / 未收藏/ LogRocket - Medium/
发送到 kindle
Bolt.new revolutionizes how you build and deploy web apps with no-code development and seamless AI integration.
The post How to build and deploy a web app with Bolt appeared first on LogRocket Blog.
The post How to build and deploy a web app with Bolt appeared first on LogRocket Blog.
2025-06-18 a month ago / 未收藏/ HTML5 Weekly Archive Feed/
发送到 kindle
|


"Sonu Kapoor" / 2025-06-19 a month ago / 未收藏/ sitepoint/
发送到 kindle
 Discover how Angular Signals revolutionize data flow with reactive variables, not streams. Learn production gotchas, when to choose Signals over RxJS, and real-world patterns
Continue reading
Angular Signals: A New Mental Model for Reactivity, Not Just a New API
on SitePoint.
Discover how Angular Signals revolutionize data flow with reactive variables, not streams. Learn production gotchas, when to choose Signals over RxJS, and real-world patterns
Continue reading
Angular Signals: A New Mental Model for Reactivity, Not Just a New API
on SitePoint.
2025-06-18 a month ago / 未收藏/ egghead.io - Bite-sized Web Development Video Tutorials & Training/
发送到 kindle
This lesson demonstrates how to give Cursor direct access to your terminal output using the [Nx MCP extension](https://nx.dev/getting-started/ai-integration?utm_source=youtube&utm_medium=videos&utm_campaign=Nx-AI&utm_id=Nx-AI), enabling automatic error detection and fixing in monorepo projects.
**Workflow demonstrated in this lesson:**
- Encounter a runtime error when serving a Vite application in an Nx monorepo
- Install and configure the Nx Console extension with MCP integration
- Ask Cursor to check your terminal for errors and fix the underlying issues
- Watch as the AI accesses running task details and terminal output through Nx MCP tools
- Observe how it analyzes workspace relationships to identify incorrect imports and missing dependencies
**Key benefits:**
- Seamless Error Handling: AI gains direct access to terminal output and running task information
- Automatic Diagnosis: Accurately identify the root cause of errors without manual copying
- Context-Aware Fixes: Leverage workspace knowledge to implement proper solutions
- Reduced Context Switching: Eliminate the need to manually relay information between terminal and AI
2025-06-19 a month ago / 未收藏/ egghead.io - Bite-sized Web Development Video Tutorials & Training/
发送到 kindle
While command-line chats with local AI models are useful, the real power comes from scripting. This lesson walks you through the initial setup for creating powerful, local AI-driven scripts by combining Ollama, the Vercel AI SDK, and Zod.
You'll learn how to take a natural language command, like "Concatenate all of the markdown files in my Downloads folder into a single file," and use the `generateObject` function to intelligently extract structured, actionable data from it.
**Workflow demonstrated in this lesson:**
* Install and set up the `ollama-ai-provider`, `ai`, and `zod` packages.
* Create a local AI model instance using Ollama and the Gemma 3 model.
* Define a Zod schema to specify the exact data structure you want to extract (e.g., `{ command: string }`).
* Use `generateObject` to pass a natural language prompt to the local model and receive a structured JSON object that matches your schema.
* Run the script using `bun` to see the local model successfully infer the "concatenate" command from a full sentence.
This foundational lesson unlocks the ability to build sophisticated, automated workflows by translating human language into machine-readable commands, all running entirely on your local machine.
2025-06-19 a month ago / 未收藏/ egghead.io - Bite-sized Web Development Video Tutorials & Training/
发送到 kindle
Hardcoded prompts are great for testing, but a truly useful script needs to respond to dynamic user input. This lesson shows you how to make your local AI script interactive by capturing command-line arguments.
You'll learn how to use Node.js's built-in `parseArgs` utility to take a user's natural language command directly from the terminal and pass it to your local language model for processing.
**Workflow demonstrated in this lesson:**
* Import the `parseArgs` function from the `node:util` module.
* Configure `parseArgs` to accept positional arguments from the command line.
* Replace the static, hardcoded prompt with the dynamic input provided by the user.
* Run the script with different sentences (e.g., `"Download a file"` or `"I want to download a file"`) to demonstrate that the AI can correctly infer the core command regardless of the phrasing.
By the end of this short lesson, your script will be able to accept and process commands directly from the user, making it a flexible and reusable command-line tool.
2025-06-19 a month ago / 未收藏/ egghead.io - Bite-sized Web Development Video Tutorials & Training/
发送到 kindle
A command is useless without knowing what to act upon. This lesson elevates your local AI script by giving it context from your project's file system. You'll learn how to find all relevant files and empower the AI to intelligently select the correct one based on your prompt.
The core technique involves using the `globby` package to scan for files and then feeding that list into a Zod `enum`. This constrains the AI's choices to a valid set of files, allowing it to accurately determine which file you're referring to in a natural language command.
**Workflow demonstrated in this lesson:**
* Install and import the `globby` library to find files based on a pattern (e.g., all `.json` files).
* Add a `filePath` field to your Zod schema.
* Define the `filePath` as `z.enum(files)`, where `files` is the array of file paths returned by `globby`.
* Pass a natural language prompt like "Summarize our typescript config" to the script.
* Observe how the AI correctly identifies `tsconfig.json` from the list of available JSON files and returns it as structured data.
This lesson is a crucial step toward building powerful, context-aware tools that can intelligently interact with your project's files based on simple, human-readable commands.
2025-06-19 a month ago / 未收藏/ egghead.io - Bite-sized Web Development Video Tutorials & Training/
发送到 kindle
Once your script can understand a user's command and identify a target file, the next step is to perform an action. This lesson shows you how to use the Vercel AI SDK's `generateText` function to process a file's content and produce a relevant, AI-generated response.
You'll learn how to read the content from the file path you've already identified, combine it with the inferred command into a new, more detailed prompt, and then pass it back to your local AI model to generate a final text output, such as a summary or a review.
**Workflow demonstrated in this lesson:**
* Import the `generateText` function from the `ai` SDK.
* Read the file content from the `filePath` returned by `generateObject`.
* Construct a new, structured prompt that includes the original command (e.g., "summarize") and the full content of the file.
* Pass this new prompt to the `generateText` function.
* Log the resulting AI-generated text to the console.
* Run the script with commands like "Summarize our TypeScript config" or "Review my package file" to see the full, context-aware output.
This lesson completes the core cycle of your AI script: understanding a command, reading the relevant context, and generating a useful, text-based result, all on your local machine.
2025-06-19 a month ago / 未收藏/ egghead.io - Bite-sized Web Development Video Tutorials & Training/
发送到 kindle
AI models won't always give you the answer you expect; sometimes they'll return invalid data or "hallucinate" a response that doesn't fit your schema. This lesson teaches you how to make your local AI script more robust by implementing essential error handling for user commands.
You'll learn how to validate the AI's output against a predefined list of valid commands and gracefully catch errors when the model generates an unexpected response, ensuring your script fails predictably and provides helpful feedback to the user.
**Workflow demonstrated in this lesson:**
* Define a list of `validCommands` (e.g., `summarize`, `translate`, `review`) to constrain the AI's choices.
* Wrap the `generateObject` call in a `try...catch` block to handle cases where the AI's output doesn't match the Zod schema.
* Implement a type guard function (`isValidCommand`) to check if the command returned by the AI is in your list of valid commands.
* Provide clear error messages to the user, indicating what went wrong and what the valid commands are.
* Test the script with invalid commands (like "taco" or "delete") to confirm that the error handling works as expected.
By adding these checks, you make your script significantly more reliable and user-friendly, preventing it from crashing on bad input and guiding the user toward correct usage.
2025-06-19 a month ago / 未收藏/ egghead.io - Bite-sized Web Development Video Tutorials & Training/
发送到 kindle
Hardcoding command logic and prompts directly into your script makes it rigid and difficult to extend. This lesson demonstrates a more flexible and powerful pattern: defining your script's commands as individual Markdown files in a dedicated directory.
This approach allows you to easily add, remove, or modify commands without touching the core script logic. You'll learn how to dynamically load these command files, present them as options to the AI, and inject the corresponding instructions into your prompt, creating a truly modular and extensible tool.
**Workflow demonstrated in this lesson:**
* Create a `commands` directory to house your command definitions (e.g., `summarize.md`, `translate.md`).
* In each file, write the specific prompt or instructions for that command.
* Use `globby` to discover all available command files at runtime.
* Create a `commandMap` that maps the filename (e.g., "summarize") to its file content.
* Update the Zod schema to use an `enum` of the dynamically discovered command names.
* Dynamically construct the final text generation prompt by injecting the instructions from the user-selected command file.
* Add a `profile.md` file to demonstrate how the script can act on user-created content with the new file-based commands.
By the end of this lesson, your script will be architected for easy expansion, allowing you to build a robust library of custom commands simply by adding new text files.
2025-06-19 a month ago / 未收藏/ egghead.io - Bite-sized Web Development Video Tutorials & Training/
发送到 kindle
Hardcoding your script to search for only one type of file (like `.md`) is a major limitation. This lesson shows you how to make your script smarter by teaching it to infer the desired file type directly from the user's natural language prompt.
You'll implement a two-stage AI process. The first stage analyzes the user's request to determine the file extension they're interested in (e.g., `md`, `txt`). The second stage then uses that file type to dynamically search the file system, find the relevant files, and execute the command.
**Workflow demonstrated in this lesson:**
* Add a preliminary `generateObject` call to extract a `fileType` from the user's initial prompt.
* Define a list of supported `fileTypes` (e.g., `['md', 'txt']`) and use a detailed prompt to guide the AI, instructing it to choose from the list or use a default.
* Dynamically construct the `globby` pattern using the inferred `fileType` (e.g., `*.$[fileType]`).
* Implement error handling to inform the user if they request an unsupported file type or if no files of the specified type are found.
* Demonstrate how the script defaults to searching for Markdown files but can correctly search for other types when specified (e.g., "summarize my profile from my pdf").
This technique adds a significant layer of intelligence to your script, allowing it to adapt its behavior based on the user's intent and making it a far more flexible and intuitive command-line tool.
"阮一峰" / 2025-06-20 a month ago / 未收藏/ 阮一峰的网络日志/
发送到 kindle
这里记录每周值得分享的科技内容,周五发布。
本杂志开源,欢迎投稿。另有《谁在招人》服务,发布程序员招聘信息。合作请邮件联系(yifeng.ruan@gmail.com)。

6月17日晚,重庆举行超大规模无人机表演,共有11787架无人机,上图是其中一个场景"天上的重庆"。(via)

这种风格使用液体玻璃,作为控件(上图)。早先的扁平化风格,被一股脑抛弃。
下图左面是原来扁平化风格的 iPhone,右面是这次测试版的液态玻璃。

我知道的绝大部分人,对这种新风格都是差评,觉得不好看。大家想不通,为什么苹果要在屏幕上,添加一个额外的半透明玻璃层。
甚至有人说,如果乔布斯看到 iPhone 变成这样,会解雇所有人(下图)。

那么,到底为什么呢,苹果好端端的,突然要大改界面?
官方完全回避这个问题,我倒是看到一篇解读,提出了一个很有见解的猜测。
他说,苹果这样做,压根不是为了审美,而是为了下一代的空间计算,也就是 AR。
现在的计算设备,都是二维的平面交互,用户面对一个扁平的屏幕,所以适合二维的扁平化风格。
但是,对于 AR 设备,用户进入的是一个 3D 空间,接触的东西都是立体的,所以需要一个立体的界面。
AR 设备没有屏幕,只有空间。屏幕不重要,空间才重要。
液态玻璃就是一个空间设计,目的是让界面有一个实体,让你感觉每个按钮都是一个有体积的实物。并且,它半透明,不会遮住后面,从而产生空间层次感。
从这个角度,苹果的界面设计副总裁 Alan Dye 对液态玻璃的介绍,就很容易解读。
苹果的 AR 设备,目前只有 Vision Pro 头盔。

液态玻璃界面,应该最初是为了这个头盔设计的。在 AR 空间中,操作界面就是一块悬浮的玻璃,这非常合理。

苹果为了统一设计语言,索性让 iPhone 和 Mac 也用了它。开发者只需要设计一次,就能适配所有苹果设备。
这样做,有利于推广 AR。试想一下,用户在手机和电脑上,已经熟悉了液态玻璃风格,当他最终戴上 AR 设备时,就不会对这种界面感到陌生,仿佛 AR 设备只是 iPhone 的自然延伸。
如果苹果确实是这样的考虑,那么我们可以确定,苹果下一步会大力推广空间计算。
Vision Pro 虽然卖得不好,但是苹果不仅不会放弃它,反而会加大投入,很可能还会推出轻量级的 AR 眼镜。

AR 也许是计算机行业的下一个热点,苹果已经在布局。
并且,液态玻璃界面要求实时模糊、动态透明、情境照明。这些效果需要强大的 GPU 实时渲染,这正是苹果芯片的强项,对手的硬件可能会出现卡顿,从而进一步加大苹果的优势。

未来,广告的制作成本越来越低,注定会无所不在,并且还会针对每个人,生成个性化广告。
(2)加拿大有一只小乌龟,断了一只脚。一家博物馆用乐高积木,为它制作了助行器。


这件事很有意义,因为乌龟的寿命很长,可以达到50年~80年。助行器能帮助它几十年。

(3)美国国防部研究局 DARPA,创造了无线传输能量的世界纪录。

他们使用激光,在8.6公里外传输能量,持续了30秒,每秒功率超过800瓦。这是迄今无线传输能量的最远距离。
上图是激光接收器,激光进入中心的孔以后,会被反射到内部的数十个光伏板,这些光伏板将能量转换回电能。
(4)除了人形机器人,还有虫形机器人。

一家美国公司制作了蜈蚣机器人,它可以爬行,适合起伏的地形,目前用来除草。

(5)一项研究发现,手写能增加大脑活动和参与度,比键盘打字更有利于记忆和学习。因此,学习重要的内容,可以尝试手写。

作者认为,网页元素的 class 属性有很多弊端,可以不用,改用替代写法,很有启发性。
2、短信发送天气预报教程(英文)

本文介绍怎么使用短信,给自己发送天气预报。
3、更好的 Shell 历史搜索(英文)

本文教你怎么打造更好用的 Shell 历史搜索。
4、让 NotebookLM 更好用的3个浏览器插件(英文)

谷歌的 AI 笔记应用 NotebookLM 非常有用,本文介绍三个 Chrome 插件,让它更易于使用。
5、SSL 为何改名为 TLS(英文)

HTTP 的加密协议 SSL,后来改名为 TLS,本文解释原因,完全是大公司斗争的产物。
6、自适应网页的正确写法(英文)

为了适应手机浏览器,网页的 HTML 头部一般会加上缩放命令,比如

网站流量统计分析工具,Google Analytics 的自托管替代品。
2、worklenz

一个开源的团队项目管理工具,自带后端和前端。
3、Kopia

一个开源的备份/恢复工具,可以将指定的目录或文件,备份到云存储服务商,有命令行和图形两种界面。
4、Eyesite

一个开源的实验项目,用摄像头捕捉用户的目光移动,从而代替鼠标,参见介绍文章。
5、Unbound

自搭建的家用 DNS 服务器。
6、Rspamd(英文)

开源的垃圾邮件过滤系统,用来检测垃圾邮件。
7、Sync your cookie

开源的 Chrome 插件,将 Cookie 同步到 Cloudflare,用于在不同设备之间共享 Cookie。(@jackluson 投稿)
8、Link Checker

网站链接检查器,输入网站链接,找出其中的死链接,代码开源。(@isixe 投稿)
9、Ayanami

纯前端的像素编辑器,支持帧动画。(@KamiC6238 投稿)
10、chromium-style-qrcode-generator-with-wasm

使用 Rust 和 WebAssembly 技术的 Chrome 风格二维码生成器,纯网页应用,不需要后端。(@liuliangsir 投稿)

每日自动抓取 arxiv 论文,并使用 AI 进行汇总,使用 GitHub Pages 进行展示。(@dw-dengwei 投稿)
2、中国城市地铁可视化

一个交互式网页可视化应用,展示中国城市地铁线路,代码开源。(@thecuvii 投稿)
3、Thiings

一个搜索下载 3D 图标的网站,现有近3000个图标。
4、无字证明(Proofs without words)

这个网站收集各种数学定理的图像证明,上图是前 n 个奇数之和等于 n 的平方。
Reddit 是美国最大的网上社区,有无数个子频道。任何关键字,都能创建一个子频道,类似于百度贴吧。
下图是按照成员人数的 Reddit 子频道排名。

不知道看哪个频道,可以先去上面这些频道,比如排名第一的 Funny 频道。
2、Meat 的五次收购

上图是 Meat 历史上五次最大的收购。
其中,第二大收购是上周刚刚完成的,这个交易非常奇特。
Meta 以143亿美元投资 Scale AI,获取后者的少数股权,并让后者的28岁 CEO 亚历山大·王(Alexandr Wang)辞职加盟 Meta,负责 AI 部门。

也就是说,Meta 实际上是花了143亿美元,挖角了亚历山大·王这个人。AI 人才的价码之高,令人咋舌。
"胶水工作"(glue work)指的是,帮助做出产品、提高效率的一些辅助工作。
举例来说,更新文档、解决技术债务、培训新人、维护团队成员的正常交流等等,都属于胶水工作。每个团队都需要大量这类工作。
我认为,胶水工作非常重要,如果没有它们来粘合整个团队,就很难做出大型产品,也无法减少大型组织中的摩擦。
有些工程师因此很天真,将大量精力花在这些胶水工作。但是,在晋升或发放奖金时,这些工程师往往被忽视,公司更看重那些销售直接相关的工作(如开发新功能)的工程师。
为什么胶水工作不能让你得到晋升呢?
是因为公司太愚蠢,看不到这些工作的价值吗?我不这么认为。
公司不奖励胶水工作,因为他们不想让你优先考虑它,而想让你更重视产品的发布。胶水工作很辛苦。如果你有能力做好胶水工作,他们希望你把这种能力用在产品发布,而不是提高团队效率。
你必须明白,让团队更顺利地运行不是你的工作,你的真正工作是执行公司领导层的使命。
有一个很少人知道的事实是,与其花大量时间提高团队效率,不如让团队以60%的效率运行。
这里有两个主要原因。
(1)如果团队以100%的效率运行,团队成员不可避免地会精疲力尽,这对每个人都不好。
(2)最好让团队成员习惯于在公司的基本效率水平上运作,而不是在短时间内人为地消除摩擦。因为低摩擦的状态不可能长期持续,这要求巨大的投入。
大型科技公司在任何时间内都以大约20%-60%的效率运行(公司越大,运行效率越低)。大公司的增长主要在于占据更多的市场,而不在于提高效率,所以公司不在意让团队效率提高到一个很高的水平。另一方面,如果个别员工愿意在胶水工作上投入大量时间,将团队的效率提升到80%或90%,公司将利用这种免费价值,但公司对长期锁定这种价值没有任何真正的兴趣,因为这取决于优秀的人才自愿奉献时间,是不可持续的。
所以,结论就是,公司需要有一些胶水工作,但是不需要太多的胶水工作。
作为开发者,你的正确做法应该是,在战术层面上做一些胶水工作,而不能把胶水工作提高到战略层面。
也就是说,你应该把胶水工作视为额外工作,你的关注重点永远应该是项目的成功。你不会因为胶水工作而得到特别的奖励,但你会因为项目的成功而获得奖励。
政府的软件采购方式,花费大量资金,引发大量新闻报道,涉及大量人员,但最终不会有一款软件真正进入工作,用户仍将使用 Excel 处理所有事情,使用 PowerPoint 生成幻灯片。
-- Hacker News 读者,评论美国国防部向 OpenAI 采购2亿美元 AI 模型
2、
未来,你还是需要学习编程。因为你需要能够准确地告诉 AI 你想要什么,了解计算机的工作原理有助于你编写更精确的提示和指令。
-- 吴恩达,著名 AI 科学家,斯坦福大学教授
3、
宇航员在太空洗衣服吗?答案是不洗。
国际空间站的供水很有限,根本没有设计洗衣服的功能。宇航员的衣服弄脏以后,要么继续穿,要么直接扔掉。脏衣服会在返回大气层的时候,全部烧掉。
-- 《宇航员在太空洗衣服吗》
4、
我担心,以后在重要的媒体中,实质性内容将逐渐衰落,30秒的片段会流行,节目只具有最低的共识,充斥着对伪科学和迷信的盲目介绍,尤其还有一种对无知的庆祝。
-- 卡尔·萨根,美国著名科普作家,这段话写于1994年
最酷的乐高作品(#256)
如何走出失望和怀疑(#206)
显卡缺货与异业竞争(#156)
(完)
本杂志开源,欢迎投稿。另有《谁在招人》服务,发布程序员招聘信息。合作请邮件联系(yifeng.ruan@gmail.com)。
封面图
6月17日晚,重庆举行超大规模无人机表演,共有11787架无人机,上图是其中一个场景"天上的重庆"。(via)
苹果的"液态玻璃"是为了 AR
上周,苹果公司发布了新的设计风格"液态玻璃"(liquid glass)。这种风格使用液体玻璃,作为控件(上图)。早先的扁平化风格,被一股脑抛弃。
下图左面是原来扁平化风格的 iPhone,右面是这次测试版的液态玻璃。
我知道的绝大部分人,对这种新风格都是差评,觉得不好看。大家想不通,为什么苹果要在屏幕上,添加一个额外的半透明玻璃层。
甚至有人说,如果乔布斯看到 iPhone 变成这样,会解雇所有人(下图)。
那么,到底为什么呢,苹果好端端的,突然要大改界面?
官方完全回避这个问题,我倒是看到一篇解读,提出了一个很有见解的猜测。
他说,苹果这样做,压根不是为了审美,而是为了下一代的空间计算,也就是 AR。
现在的计算设备,都是二维的平面交互,用户面对一个扁平的屏幕,所以适合二维的扁平化风格。
但是,对于 AR 设备,用户进入的是一个 3D 空间,接触的东西都是立体的,所以需要一个立体的界面。
AR 设备没有屏幕,只有空间。屏幕不重要,空间才重要。
液态玻璃就是一个空间设计,目的是让界面有一个实体,让你感觉每个按钮都是一个有体积的实物。并且,它半透明,不会遮住后面,从而产生空间层次感。
从这个角度,苹果的界面设计副总裁 Alan Dye 对液态玻璃的介绍,就很容易解读。
每个元素都经过精心设计,赋予了它们物理感:它们具有维度,能够动态响应光线,并投射阴影。
苹果的 AR 设备,目前只有 Vision Pro 头盔。
液态玻璃界面,应该最初是为了这个头盔设计的。在 AR 空间中,操作界面就是一块悬浮的玻璃,这非常合理。
苹果为了统一设计语言,索性让 iPhone 和 Mac 也用了它。开发者只需要设计一次,就能适配所有苹果设备。
这样做,有利于推广 AR。试想一下,用户在手机和电脑上,已经熟悉了液态玻璃风格,当他最终戴上 AR 设备时,就不会对这种界面感到陌生,仿佛 AR 设备只是 iPhone 的自然延伸。
如果苹果确实是这样的考虑,那么我们可以确定,苹果下一步会大力推广空间计算。
Vision Pro 虽然卖得不好,但是苹果不仅不会放弃它,反而会加大投入,很可能还会推出轻量级的 AR 眼镜。
AR 也许是计算机行业的下一个热点,苹果已经在布局。
并且,液态玻璃界面要求实时模糊、动态透明、情境照明。这些效果需要强大的 GPU 实时渲染,这正是苹果芯片的强项,对手的硬件可能会出现卡顿,从而进一步加大苹果的优势。
科技动态
(1)Meta 公司推出 AI 广告,用户上传产品照片,系统就会自动生成广告视频,并配好音乐和文案。未来,广告的制作成本越来越低,注定会无所不在,并且还会针对每个人,生成个性化广告。
(2)加拿大有一只小乌龟,断了一只脚。一家博物馆用乐高积木,为它制作了助行器。
这件事很有意义,因为乌龟的寿命很长,可以达到50年~80年。助行器能帮助它几十年。
(3)美国国防部研究局 DARPA,创造了无线传输能量的世界纪录。
他们使用激光,在8.6公里外传输能量,持续了30秒,每秒功率超过800瓦。这是迄今无线传输能量的最远距离。
上图是激光接收器,激光进入中心的孔以后,会被反射到内部的数十个光伏板,这些光伏板将能量转换回电能。
(4)除了人形机器人,还有虫形机器人。
一家美国公司制作了蜈蚣机器人,它可以爬行,适合起伏的地形,目前用来除草。
(5)一项研究发现,手写能增加大脑活动和参与度,比键盘打字更有利于记忆和学习。因此,学习重要的内容,可以尝试手写。
文章
1、CSS class 的替代方法(英文)作者认为,网页元素的 class 属性有很多弊端,可以不用,改用替代写法,很有启发性。
2、短信发送天气预报教程(英文)
本文介绍怎么使用短信,给自己发送天气预报。
3、更好的 Shell 历史搜索(英文)
本文教你怎么打造更好用的 Shell 历史搜索。
4、让 NotebookLM 更好用的3个浏览器插件(英文)
谷歌的 AI 笔记应用 NotebookLM 非常有用,本文介绍三个 Chrome 插件,让它更易于使用。
5、SSL 为何改名为 TLS(英文)
HTTP 的加密协议 SSL,后来改名为 TLS,本文解释原因,完全是大公司斗争的产物。
6、自适应网页的正确写法(英文)
为了适应手机浏览器,网页的 HTML 头部一般会加上缩放命令,比如
width=device-width。本文介绍这个命令的正确写法。工具
1、Vince网站流量统计分析工具,Google Analytics 的自托管替代品。
2、worklenz
一个开源的团队项目管理工具,自带后端和前端。
3、Kopia
一个开源的备份/恢复工具,可以将指定的目录或文件,备份到云存储服务商,有命令行和图形两种界面。
4、Eyesite
一个开源的实验项目,用摄像头捕捉用户的目光移动,从而代替鼠标,参见介绍文章。
5、Unbound
自搭建的家用 DNS 服务器。
6、Rspamd(英文)
开源的垃圾邮件过滤系统,用来检测垃圾邮件。
7、Sync your cookie
开源的 Chrome 插件,将 Cookie 同步到 Cloudflare,用于在不同设备之间共享 Cookie。(@jackluson 投稿)
8、Link Checker
网站链接检查器,输入网站链接,找出其中的死链接,代码开源。(@isixe 投稿)
9、Ayanami
纯前端的像素编辑器,支持帧动画。(@KamiC6238 投稿)
10、chromium-style-qrcode-generator-with-wasm
使用 Rust 和 WebAssembly 技术的 Chrome 风格二维码生成器,纯网页应用,不需要后端。(@liuliangsir 投稿)
资源
1、Daily arXiv AI Enhanced每日自动抓取 arxiv 论文,并使用 AI 进行汇总,使用 GitHub Pages 进行展示。(@dw-dengwei 投稿)
2、中国城市地铁可视化
一个交互式网页可视化应用,展示中国城市地铁线路,代码开源。(@thecuvii 投稿)
3、Thiings
一个搜索下载 3D 图标的网站,现有近3000个图标。
4、无字证明(Proofs without words)
这个网站收集各种数学定理的图像证明,上图是前 n 个奇数之和等于 n 的平方。
图片
1、Reddit 的子频道Reddit 是美国最大的网上社区,有无数个子频道。任何关键字,都能创建一个子频道,类似于百度贴吧。
下图是按照成员人数的 Reddit 子频道排名。
不知道看哪个频道,可以先去上面这些频道,比如排名第一的 Funny 频道。
2、Meat 的五次收购
上图是 Meat 历史上五次最大的收购。
其中,第二大收购是上周刚刚完成的,这个交易非常奇特。
Meta 以143亿美元投资 Scale AI,获取后者的少数股权,并让后者的28岁 CEO 亚历山大·王(Alexandr Wang)辞职加盟 Meta,负责 AI 部门。
也就是说,Meta 实际上是花了143亿美元,挖角了亚历山大·王这个人。AI 人才的价码之高,令人咋舌。
文摘
1、胶水工作重要吗?"胶水工作"(glue work)指的是,帮助做出产品、提高效率的一些辅助工作。
举例来说,更新文档、解决技术债务、培训新人、维护团队成员的正常交流等等,都属于胶水工作。每个团队都需要大量这类工作。
我认为,胶水工作非常重要,如果没有它们来粘合整个团队,就很难做出大型产品,也无法减少大型组织中的摩擦。
有些工程师因此很天真,将大量精力花在这些胶水工作。但是,在晋升或发放奖金时,这些工程师往往被忽视,公司更看重那些销售直接相关的工作(如开发新功能)的工程师。
为什么胶水工作不能让你得到晋升呢?
是因为公司太愚蠢,看不到这些工作的价值吗?我不这么认为。
公司不奖励胶水工作,因为他们不想让你优先考虑它,而想让你更重视产品的发布。胶水工作很辛苦。如果你有能力做好胶水工作,他们希望你把这种能力用在产品发布,而不是提高团队效率。
你必须明白,让团队更顺利地运行不是你的工作,你的真正工作是执行公司领导层的使命。
有一个很少人知道的事实是,与其花大量时间提高团队效率,不如让团队以60%的效率运行。
这里有两个主要原因。
(1)如果团队以100%的效率运行,团队成员不可避免地会精疲力尽,这对每个人都不好。
(2)最好让团队成员习惯于在公司的基本效率水平上运作,而不是在短时间内人为地消除摩擦。因为低摩擦的状态不可能长期持续,这要求巨大的投入。
大型科技公司在任何时间内都以大约20%-60%的效率运行(公司越大,运行效率越低)。大公司的增长主要在于占据更多的市场,而不在于提高效率,所以公司不在意让团队效率提高到一个很高的水平。另一方面,如果个别员工愿意在胶水工作上投入大量时间,将团队的效率提升到80%或90%,公司将利用这种免费价值,但公司对长期锁定这种价值没有任何真正的兴趣,因为这取决于优秀的人才自愿奉献时间,是不可持续的。
所以,结论就是,公司需要有一些胶水工作,但是不需要太多的胶水工作。
作为开发者,你的正确做法应该是,在战术层面上做一些胶水工作,而不能把胶水工作提高到战略层面。
也就是说,你应该把胶水工作视为额外工作,你的关注重点永远应该是项目的成功。你不会因为胶水工作而得到特别的奖励,但你会因为项目的成功而获得奖励。
言论
1、政府的软件采购方式,花费大量资金,引发大量新闻报道,涉及大量人员,但最终不会有一款软件真正进入工作,用户仍将使用 Excel 处理所有事情,使用 PowerPoint 生成幻灯片。
-- Hacker News 读者,评论美国国防部向 OpenAI 采购2亿美元 AI 模型
2、
未来,你还是需要学习编程。因为你需要能够准确地告诉 AI 你想要什么,了解计算机的工作原理有助于你编写更精确的提示和指令。
-- 吴恩达,著名 AI 科学家,斯坦福大学教授
3、
宇航员在太空洗衣服吗?答案是不洗。
国际空间站的供水很有限,根本没有设计洗衣服的功能。宇航员的衣服弄脏以后,要么继续穿,要么直接扔掉。脏衣服会在返回大气层的时候,全部烧掉。
-- 《宇航员在太空洗衣服吗》
4、
我担心,以后在重要的媒体中,实质性内容将逐渐衰落,30秒的片段会流行,节目只具有最低的共识,充斥着对伪科学和迷信的盲目介绍,尤其还有一种对无知的庆祝。
-- 卡尔·萨根,美国著名科普作家,这段话写于1994年
往年回顾
信息就像糖一样上瘾(#306)最酷的乐高作品(#256)
如何走出失望和怀疑(#206)
显卡缺货与异业竞争(#156)
(完)
文档信息
- 版权声明:自由转载-非商用-非衍生-保持署名(创意共享3.0许可证)
- 发表日期: 2025年6月20日
"Phoebe Sajor" / 2025-06-19 a month ago / 未收藏/ Stack Overflow Blog/
发送到 kindle
As a generation characterized as "digital natives," the way Gen Z interacts with and consumes knowledge is rooted in their desire for instant gratification and personalization. How will this affect the future of knowledge management and the technologies of tomorrow?
"Katja Skafar" / 2025-06-19 a month ago / 未收藏/ Stack Overflow Blog/
发送到 kindle
In this episode of Leaders of Code, Jody Bailey, Chief Product and Technology Officer at Stack Overflow, sits down with Dane Knecht, the newly appointed Chief Technology Officer at Cloudflare.
"Phoebe Sajor" / 2025-06-20 a month ago / 未收藏/ Stack Overflow Blog/
发送到 kindle
In this special episode, Ryan is joined by our Senior VP of Community, Philippe Beaudette, and the Trust and Safety team at Stack Overflow to discuss maintaining platform integrity and managing user safety, handling complex issues like harassment, and how their team balances transparency and privacy online.
"Andrea Griffiths" / 2025-06-19 a month ago / 未收藏/ Todd Motto/
发送到 kindle
Learn how to build your first space in minutes and customize Copilot to match your team's unique coding style and workflows.
The post GitHub Copilot Spaces: Bring the right context to every suggestion appeared first on The GitHub Blog.
The post GitHub Copilot Spaces: Bring the right context to every suggestion appeared first on The GitHub Blog.
"Shaoni Mukherjee" / 2025-06-20 a month ago / 未收藏/ DigitalOcean Community Tutorials/
发送到 kindle
Introduction
Large Language Models (LLMs) have transformed AI by powering tasks like summarization, translation, and code generation. These models rely on token-based processing—breaking down text into subwords or characters to understand and generate content. While effective, this approach is limited in mimicking how humans reason and communicate through abstract, high-level concepts.Meta’s paper, “Large Concept Models: Language Modeling in a Sentence Representation Space”, proposes a fundamental shift. The paper suggests of processing concepts instead of tokens. Large Concept Models (LCMs) operate in conceptual embedding spaces, redefining how language models understand, represent, and generate meaning.
Key Takeaways
- Concept over Tokens: LCMs move away from traditional token-by-token processing and instead focus on understanding and generating language at the conceptual level.
- Better Long-Context Understanding: By reasoning with broader ideas, LCMs handle longer text inputs more effectively than current models.
- Improved Reasoning Abilities: Their structure supports more advanced, layered thinking—helpful for tasks requiring logical steps and deep understanding.
- Closer to Human-Like AI: Meta’s research brings us closer to AI systems that think more like humans, making interactions smoother, smarter, and more intuitive.
From Tokens to Concepts
The Role of Tokenization in LLMs
In traditional LLMs like GPT-4, tokenization is the first step. For instance, the sentence “Will tokenization eventually be dead?” is split into subword tokens like"Will", "token", and "ization". These tokens are then fed into a Transformer model to generate a response.The Problem
However, this approach:- Splits meaningful expressions into fragmented parts
- Operates on arbitrary units, ignoring semantic cohesion
- Struggles with long-context reasoning and hierarchical planning
The Solution: Concepts
Concepts refer to higher-order representations of meaning. They’re not tied to language-specific tokens and can be derived from text, speech, or even multimodal signals. LCMs process sentences as unified semantic units—concepts—which enables:- Better handling of long contexts
- More abstract reasoning
- Language and modality independence
What Are Large Concept Models?
Traditional AI models like ChatGPT work by predicting the next word (called a “token”) based on the previous ones. But humans don’t think like that—we think in full ideas or sentences and build up meaning in layers.A Large Concept Model (LCM) is a new type of AI model that goes beyond traditional Large Language Models (LLMs), which operate at the word or token level. Instead of focusing on predicting the next word, LCMs work with higher-level abstract ideas or “concepts”, like full sentences or meanings, to understand and generate content.
This process is much inspired by how humans think and plan—first outlining ideas and then filling in details. LCMs use a hierarchical reasoning approach. This means they first grasp the bigger picture and then focus on specifics, allowing for more coherent and structured outputs. Unlike current LLMs, which are mostly English-based and data-heavy, LCMs aim to be more efficient and language-independent by using sentence-level embeddings like SONAR.
How Do LCMs Work?
LCMs follow a three-step pipeline:-
Concept Encoder (SONAR): Input (text or speech) is broken into sentences. Each sentence is turned into a “concept embedding” using a tool called SONAR (which works in 200 languages and supports text + speech).
-
Large Concept Model (LCM): A Transformer operating entirely in concept space. It reasons over the concept sequence to generate output concepts. The concept embeddings are processed by the LCM to perform a task, like summarizing or translating. The result is a new set of concept embeddings.
-
Concept Decoder (SONAR): Translates concept embeddings back into natural language (or speech) output.

This architecture resembles the Joint Embedding Predictive Architecture (JEPA), which also promotes abstract reasoning across modalities.
Why is this approach better?
This approach can handle any language or speech/text input without needing extra training. It’s much faster and less resource-intensive than traditional LLMs because it works with fewer, more meaningful chunks (concepts instead of tokens). Further, it also supports zero-shot generalization: you don’t have to retrain it for every language or task.
The SONAR embedding space

The motivation behind this work is to enable reasoning at a higher, more meaningful level than individual words or tokens. To achieve this, the authors use SONAR—a powerful embedding system that represents entire sentences as semantic concepts. SONAR was trained using machine translation, denoising, and similarity objectives across 200 languages, and it performs exceptionally well on semantic similarity tasks. It also extends to speech through a teacher-student approach, supporting 76 languages for speech input and English for speech output. Because the Large Concept Model (LCM) operates directly on these SONAR concept embeddings, it can perform reasoning across multiple languages and modalities, including an experimental encoder for American Sign Language. This makes LCMs more inclusive, efficient, and scalable than traditional LLMs.
Base-LCM: A Naive Approach

The Base-LCM is a model designed to generate sentence-level embeddings (representing full ideas or concepts), instead of predicting one word at a time like current language models. It works by learning how to predict the next sentence embedding given previous ones, like continuing a conversation or paragraph, but at the idea level.
To do this, the model uses SONAR embeddings, which represent full sentences in a continuous space. However, since these embeddings are very different from the internal format used by the model, they are normalized and mapped into the model’s hidden space using a “PreNet.” After generating new embeddings, they’re converted back using a “PostNet.”
Training this model means teaching it to guess the next sentence’s embedding as accurately as possible—this is done by minimizing the mean squared error (MSE) between what it predicted and the true next embedding. To help it know when to stop generating during real use, the model is trained to recognize an “End of text” sentence, and it stops generating if it sees that or if the new sentence embedding is too similar to the previous one.
Additionally, because a sentence can have many valid next ideas (just like how many pictures can match one prompt in DALL·E), the authors are also exploring diffusion models and quantization to better handle the uncertainty in next-sentence generation.
Limitation
The Base-LCM assumes a single “correct” next concept, which is unrealistic since many plausible conceptual continuations may exist in context.
Diffusion-Based LCMs: Better Handling of Ambiguity
Why Diffusion?
Inspired by diffusion models in image generation, LCMs use a similar approach to predict a distribution over possible next concepts, rather than a single fixed one. Diffusion-based LCMs are advanced models that generate sentence-level concepts (embeddings) by gradually transforming random noise into meaningful sentences, similar to how diffusion models generate images.They do this in two steps: first, they add noise to clean data (the “forward process”) using a schedule that controls how much noise is added over time. Then, during generation (the “reverse process”), they learn to remove that noise step by step to recover the original sentence embedding. This reverse process is guided by learned patterns in the data and can be either conditional (based on the previous context) or unconditional. The model uses special noise schedules—like cosine, quadratic, or sigmoid—to control how it learns at different noise levels. During training, it learns how to reconstruct the original data from noisy versions using simple or weighted losses.
At inference, various techniques like classifier-free guidance, step selection, and error-scaling help improve the quality and diversity of the generated sentences. Two architectures—One-Tower and Two-Tower—are proposed for implementing this diffusion-based reasoning.
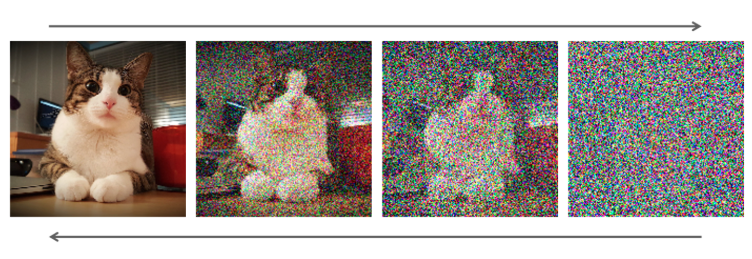
Image Source
Two Architectures
One-Tower Diffusion LCM

The One-Tower diffusion LCM is a model designed to predict clean sentence embeddings (representations of sentences) from their noisy versions, using a single Transformer. During training, it receives a mix of clean and noisy sentence embeddings as input. These embeddings are interleaved (i.e., placed alternately) so that the model sees both types but is instructed to only focus on the clean ones when making predictions. Each noisy embedding also includes information about how much noise was added (the “diffusion timestep”), which is appended to the input. The model uses causal attention—meaning it can only look at previous sentences, not future ones—to maintain the natural flow of text. Sometimes, parts of the model are trained without context (unconditional) so that later, during inference, it can balance between following context and being creative (using classifier-free guidance). This approach allows the model to efficiently learn to denoise and generate entire sequences of sentence embeddings all at once.
Two-Tower Diffusion LCM
The Two-Tower diffusion LCM separates the job of understanding the context from the task of generating the next sentence embedding.
Here’s how it works in simple terms:
-
Tower 1: Contextualizer: This is a Transformer that reads all the previous sentence embeddings (
x<n) and encodes them using causal attention—meaning it reads them one by one in order, without peeking ahead. This creates a meaningful summary of the past context.
-
Tower 2: Denoiser: This second Transformer takes in a noisy version of the next sentence embedding and tries to recover the clean version (
x₀ₙ). It does this gradually through multiple steps of denoising. To help guide this process, it uses cross-attention to look at the context produced by the first tower.
-
Adaptive LayerNorm (AdaLN): The denoiser adapts its internal computations based on how noisy the input is at each step. It does this using a small network that learns how much to scale, shift, and blend each layer’s output, depending on the timestep of the diffusion process. This helps the model adjust its behavior at different noise levels.
-
Training setup: To help the model learn, during training:
- The context is slightly shifted so that each prediction only sees past sentences.
- A zero-vector is used as a placeholder at the start of the sequence to predict the first sentence.
- Some context rows are randomly dropped (with a probability
pcfg) so the model also learns how to denoise without context—this supports classifier-free guidance during inference.
Evaluation and Results
To assess the effectiveness of Large Concept Models (LCMs), the researchers conducted comprehensive evaluations, particularly focusing on summarization tasks. The models were compared against several strong baselines, including both encoder-decoder models and decoder-only large language models (LLMs). The evaluations were done using both automatic metrics and human-aligned analysis methods.The evaluation compares multiple versions of LCMs:
- Base-LCM – the naive autoregressive version predicting the next concept deterministically.
- Diffusion-Based LCMs – including both One-Tower and Two-Tower architectures that generate concepts stochastically.
- Quant LCMs – a variant not covered in detail in the paper, but included for comparison.
- smaLLaMA – an instruction-tuned LLM used as an additional performance baseline.
- T5-3B – an encoder-decoder Transformer fine-tuned for summarization.
- Gemma-7B, LLaMA 3.1-8B, and Mistral-7B-v0.3 – decoder-only, instruction-finetuned LLMs.
Metrics Used for Evaluation
The paper employed a range of automatic metrics commonly used for evaluating natural language generation models:- ROUGE-L: Measures the longest common subsequence between generated and reference summaries.
- Coherence: A classifier-based metric evaluating logical flow and topic consistency.
- OVL-3 (Overlap Score): Quantifies how extractive or abstractive a summary is.
- Repetition Rate: Measures the frequency of repeated words/phrases in the generated output.
- CoLA (Corpus of Linguistic Acceptability): Assesses grammatical acceptability based on linguistic norms.
- SH-4 (Source Attribution): Evaluates how well the generated summary attributes content to the original source.
- SH-5 (Semantic Coverage): Measures the completeness of semantic content transfer from source to summary.
Installing and Running LCMs
Meta’s Large Concept Models rely on fairseq2 and support installation via uv or pip.Option 1: Using uv (Recommended)
# Set up environment and install CPU dependencies
uv sync --extra cpu --extra eval --extra data

# For GPU support (example: Torch 2.5.1 + CUDA 12.1)
uv pip install torch==2.5.1 --extra-index-url https://download.pytorch.org/whl/cu121 --upgrade
uv pip install fairseq2==v0.3.0rc1 --pre --extra-index-url https://fair.pkg.atmeta.com/fairseq2/whl/rc/pt2.5.1/cu121 --upgrade
Option 2: Using pip
# Install pip dependencies
pip install --upgrade pip
pip install fairseq2==v0.3.0rc1 --pre --extra-index-url https://fair.pkg.atmeta.com/fairseq2/whl/rc/pt2.5.1/cpu
pip install -e ".[data,eval]"
Preparing the Data
LCMs use sentence-level embeddings from SONAR to train on textual data.# Prepare Wikipedia data with SONAR and SaT
uv run --extra data scripts/prepare_wikipedia.py /output/dir/for/the/data
Fitting a Normalizer
python scripts/fit_embedding_normalizer.py \
  --ds dataset1:4 dataset2:1 dataset3:10 \
  --save_path "path/to/new/normalizer.pt" \
  --max_nb_samples 1000000
Pre-training LCMs
Option A: Train MSE LCM with SLURM (submitit)python -m lcm.train +pretrain=mse \
++trainer.output_dir="checkpoints/mse_lcm" \
++trainer.experiment_name=training_mse_lcm
CUDA_VISIBLE_DEVICES=0,1 torchrun --standalone --nnodes=1 --nproc-per-node=2 \
  -m lcm.train launcher=standalone \
  +pretrain=mse \
  ++trainer.data_loading_config.max_tokens=1000 \
  ++trainer.output_dir="checkpoints/mse_lcm" \
  +trainer.use_submitit=false
Finetuning the Two-Tower Diffusion LCM
CUDA_VISIBLE_DEVICES=0,1 torchrun --standalone --nnodes=1 --nproc-per-node=2 \
  -m lcm.train launcher=standalone \
  +finetune=two_tower \
  ++trainer.output_dir="checkpoints/finetune_two_tower_lcm" \
  ++trainer.data_loading_config.max_tokens=1000 \
  +trainer.use_submitit=false \
  ++trainer.model_config_or_name=my_pretrained_two_tower
Evaluating LCMs
python -m nltk.downloader punkt_tab

torchrun --standalone --nnodes=1 --nproc-per-node=1 -m lcm.evaluation \
  --predictor two_tower_diffusion_lcm \
  --model_card ./checkpoints/finetune_two_tower_lcm/checkpoints/step_1000/model_card.yaml \
  --data_loading.max_samples 100 \
  --data_loading.batch_size 4 \
  --generator_batch_size 4 \
  --dump_dir evaluation_outputs/two_tower \
  --inference_timesteps 40 \
  --initial_noise_scale 0.6 \
  --guidance_scale 3 \
  --guidance_rescale 0.7 \
  --tasks finetuning_data_lcm.validation \
  --task_args '{"max_gen_len": 10, "eos_config": {"text": "End of text."}}'
./evaluation_outputs/two_tower.Key Findings
a. Summarization Quality Diffusion-based LCMs significantly outperformed Base-LCM in both ROUGE-L and Coherence metrics. Compared to instruction-finetuned LLMs, the Two-Tower LCM achieved comparable or superior results, especially in tasks requiring semantic abstraction. The 7B parameter LCM was competitive with T5-3B, a model specifically designed and tuned for summarization tasks.b. Abstractive vs. Extractive Summarization LCMs tend to produce more abstractive summaries than traditional LLMs. This was evident from lower OVL-3 scores, suggesting that LCMs aren’t simply copying phrases from the input but are rephrasing or summarizing content at a conceptual level.
c. Repetition Handling LCMs demonstrated lower repetition rates, an important advantage for generating fluent and natural outputs. The repetition rates of LCMs were closer to human-written summaries, indicating better semantic planning during generation.
d. Fluency and Linguistic Quality Interestingly, while LCMs fared well in semantic metrics, they performed slightly lower in fluency, as measured by CoLA scores. This suggests that while the models generate meaningful summaries, they occasionally produce grammatical or stylistic inconsistencies—a possible side effect of operating in an embedding space without tight token-level control.
e. Source Attribution and Semantic Coverage On source attribution (SH-4) and semantic coverage (SH-5), LCMs performed reasonably well, but some model-based evaluation biases may have favored token-level generation from LLMs. Nevertheless, LCMs maintained core semantic fidelity, showing promise in aligning with source content at a conceptual level.
Limitations
While Large Concept Models (LCMs) show a lot of promise, there are a few key limitations that stand out.First, the model relies on the SONAR embedding space, which was trained on short, well-aligned translation data. This makes it great for capturing local meaning but less reliable for understanding loosely related sentences or more complex inputs like links, numbers, or code.
Another challenge is the use of a frozen encoder. While this makes training more efficient, it limits the model’s ability to adapt to the specific needs of concept-level modeling. An end-to-end trained encoder might offer better semantic understanding but would require more data and compute.
The way LCMs currently treat whole sentences as single “concepts” can also be problematic. Long sentences may contain multiple ideas, and breaking them down isn’t always straightforward. This makes it harder to represent them accurately with fixed-size embeddings.
There’s also a data sparsity issue. Most sentences in a training corpus are unique, making it difficult for the model to learn general patterns. Higher-level semantic representations could help, but they come with trade-offs like losing important details.
Finally, modeling text with diffusion techniques is still tricky. Text may be represented as continuous vectors, but it’s ultimately a discrete structure. The Quant-LCM attempts to handle this, but SONAR wasn’t optimized for quantization, leading to inefficiencies.
Conclusion
Large Concept Models (LCMs) represent an important step forward in how AI understands and works with language. Instead of focusing on small parts of text called tokens, LCMs look at the bigger picture—concepts and meaning. This helps them better understand longer conversations, think more logically, and support multiple languages and different types of dat, like text and images.Meta’s work on LCMs shows what the future of AI could look like: smarter, more human-like systems that truly understand context and meaning. These models have the potential to improve how we interact with AI, making it more natural, accurate, and helpful. As this technology grows, it could lead to more powerful tools for communication, creativity, and problem-solving across many fields.
"Pankaj Kumar" / 2025-06-20 a month ago / 未收藏/ DigitalOcean Community Tutorials/
发送到 kindle
Learning to send emails directly from the Linux terminal is a powerful skill for developers and system administrators. This guide will walk you through a variety of command-line tools, starting with the classic
We will learn about following commands to send emails in Linux.
Linux

In the next Window, scroll and hit ‘Internet Site’.

The system will thereafter finish up with the installation process.

Output

Alternatively, you can use the echo command to pipe the message you want to send to the mail command as shown below.

Let’s assume you have a file that you want to attach. Let’s call the file

Output

To send an email to many recipients run:
Mailx is the newer version of
Mutt is a lightweight Linux command line email client. While the

Mutt command can also be used to attach a file as follows.

Output

The

Output

This command is another popular SMTP server used in many distributions. To install

To specify the subject, add it to the file.
Sending emails to external domains like Gmail or Yahoo requires SMTP authentication. The basic
For this example, we’ll be using
Sending emails directly from a Bash script is a useful tool for automating notifications, reports, and alerts. This can be achieved using various command-line utilities, each with its own syntax and capabilities. Here are some simple examples to get you started:
For basic emailing on traditional Linux systems,
For modern scripting,
When your scripts need to send attachments, the best solution is to use
Finally, the other tools serve niche roles.
Here’s a simple breakdown to help you decide when to use which:
Run
To send an email, use this simple syntax:
Here is an example of a simple bash script that sends an email:
To install
While command-line email clients are simpler and less computationally intensive, using the right tool for the task is crucial. Basic commands like
Although GUI clients like Thunderbird are ideal for daily email management, the command-line approach remains unmatched for automating notifications and integrating email into system administration workflows, helping you avoid problems with undelivered mail in your scripts.
Now that you can send emails from the command line, you might want to dive deeper into mail server configuration or application-level email automation. Check out these guides to continue learning:
mail command for simple text messages. You will then explore more robust utilities like mutt for handling file attachments reliably and msmtp for securely authenticating with external SMTP servers like Gmail. By the end, you will be able to integrate these commands into Bash scripts to fully automate email alerts, reports, and other notifications.
How to use the Linux Send Email from Command Line?
We will learn about following commands to send emails in Linux.- mailx
- mutt
- mpack
- sendmail
1. Using mail Command
Linux mail command is quite popular and is commonly used to send emails from the command line. Mail is installed as part of mailutils on Debian/Ubuntu systems and the mailx package on Red Hat/CentOS systems. The two commands process messages on the command line. To install mailutils in Debian and Ubuntu Systems, run:- sudo apt install mailutils -y
- yum install mailx
mailutils package depends on a Mail Transfer Agent (MTA) like Postfix to handle the actual email delivery. The installation process will prompt you to configure it. Press the TAB button and hit on ‘OK’.In the next Window, scroll and hit ‘Internet Site’.
The system will thereafter finish up with the installation process.
Testing Mail command
If the mail command is successfully installed, test the application by using the following format and press enter:- mail –s "Test Email" email_address
email_address with your email address. For example,- mail –s "Test Email" james@example.com
Output
Alternatively, you can use the echo command to pipe the message you want to send to the mail command as shown below.
- echo "sample message" | mail -s "sample mail subject" email_address
- echo "Hello world" | mail -s "Test" james@example.com
Let’s assume you have a file that you want to attach. Let’s call the file
message.txt How do you go about it? Use the command below.- mail -s "subject" -A message.txt email_address
-A flag defines attachment of the file. For example;- mail -s "Important Notice" -A message.txt james@example.com
Output
To send an email to many recipients run:
- mail –s "test header" email_address email_address2
2. How to use the mailx command?
Mailx is the newer version of mail command and was formerly referred to as nail in other implementations. Mailx has been around since 1986 and was incorporated into POSIX in the year 1992. On Debian-based systems, mailx is available as a standalone package. Users, system administrators, and developers can use this mail utility. The implementation of mailx also takes the same form as the mail command line syntax. To install mailx in Debian/Ubuntu Systems run:- sudo apt install mailx
- yum install mailx
Testing Mailx command
You may use the echo command to direct the output to the mail command without being prompted for CC and the message body as shown here:- echo "message body" | mail -s "subject" email_address
- echo "Make the most out of Linux!" | mail -s "Welcome to Linux" james@example.com
3. Using the MUTT Command
Mutt is a lightweight Linux command line email client. While the mail command can send basic attachments, mutt provides more reliable and powerful features for handling attachments, especially with MIME types. Mutt also reads emails from POP/IMAP servers and connecting local users via the terminal. To install mutt in Debian / Ubuntu Systems run:- sudo apt install mutt
- sudo yum install mutt
Testing Mutt command
You can send a blank message usingmutt with the < /dev/null right after the email address.- mutt -s "Test Email" email_address < /dev/null
- mutt -s "Greetings" james@jaykiarie.com < /dev/null
Mutt command can also be used to attach a file as follows.
- echo "Message body" | mutt -a "/path/to/file.to.attach" -s "subject of message" -- email_address
- echo "Hey guys! How's it going ?" | mutt -a report.doc -s "Notice !" -- james@jaykiarie.com
-- separator is used to signify the end of options, ensuring that the email address is not accidentally interpreted as a command-line flag.Output
4. Using mpack command
The mpack command is used to encode the file into MIME messages and sends them to one or several recipients, or it can even be used to post to different newsgroups. To install mpack in Debian/Ubuntu Systems run:- sudo apt install mpack
mpack in Red Hat/CentOS Systems run:- sudo yum install mpack
Testing mpack command
Usingmpack to send email or attachment via command line is as simple as:- mpack -s "Subject here" -a file email_address
- mpack -s "Sales Report 2019" -a report.doc james@jaykiarie.com
Output
5. Using sendmail
This command is another popular SMTP server used in many distributions. To install sendmail in Debian/Ubuntu Systems run:- sudo apt install sendmail
sendmail in Red Hat/CentOS Systems run:- sudo yum install sendmail
Testing sendmail command
You can use the following instructions to send email using thesendmail command:- sendmail email_address < file
report.doc with the following text:Hello there !
- sendmail james@example.com < report.doc
To specify the subject, add it to the file.
Subject: Sendmail test email
Hello there!
How to send emails with authentication over SMTP (e.g., Gmail)?
Sending emails to external domains like Gmail or Yahoo requires SMTP authentication. The basic mail command often lacks direct support for this. You’ll need to use a tool that can handle SMTP authentication, such as msmtp or configure a full MTA like Postfix to relay through Gmail’s SMTP server.For this example, we’ll be using
msmtp. msmtp is a lightweight SMTP client specifically designed for sending emails with authentication.-
Install
msmtpusing one of the following commands:
- Debian/Ubuntu:
sudo apt install msmtp msmtp-mta - RedHat/CentOS:
sudo yum install msmtp
- Debian/Ubuntu:
-
Next, create or edit the
~/.msmtprcfile with your Gmail credentials:
Replaceaccount gmail host smtp.gmail.com port 587 from your_gmail_address@gmail.com auth on user your_gmail_address@gmail.com password your_gmail_password tls on tls_starttls on tls_trust_file /etc/ssl/certs/ca-certificates.crt # Path may vary logfile ~/.msmtp.log account default : gmailyour_gmail_address@gmail.comwith your Gmail account andyour_gmail_passwordwith your App password. You can obtain this by going into the Security page of your Google Account.
Also, ensure thetls_trust_filepath is correct for your system.
-
Set strict file permissions so only you can read and write to it. This is vital as it contains your password.
- chmod 600 ~/.msmtprc
-
You can now use
msmtpas a drop-in replacement for sendmail or pipe to it:
Or:- echo "This is a test email sent via msmtp." | mail -s "msmtp Test" -a attachment.txt recipient@example.com -r your_gmail_address@gmail.com
- msmtp recipient@example.com <<EOF
- From: your_gmail_address@gmail.com
- Subject: Test Email with msmtp
- This is the body of the email.
- EOF
How to send emails in Bash Scripts?
Sending emails directly from a Bash script is a useful tool for automating notifications, reports, and alerts. This can be achieved using various command-line utilities, each with its own syntax and capabilities. Here are some simple examples to get you started:-
You can write a simple Bash script to send an email notification based on certain condition. This script sends an email whenever the disk usage is over 90%:
This script can be scheduled to run at regular intervals to check whether the disk usage exceeds the limit.#!/bin/bash # Check disk space disk_usage=$(df -h / | awk 'NR==2 {print $5}') # Send email if disk usage is above 90% if [[ ${disk_usage%\%} -gt 90 ]]; then echo "Warning: Disk usage on / is above 90% ($disk_usage)" | mail -s "Disk Space Alert" admin@example.com fi
-
You can also use a Bash script to send a file as an attachment:
The script generates a file named#!/bin/bash # Create a log file echo "This is a sample log message." > mylog.txt # Send the log file as an attachment mail -s "Log File" -a mylog.txt admin@example.com < /dev/nullmylog.txtand attaches it to the email. When usingmailwith attachments in scripts, consider usingmuttfor more reliable attachment handling, especially for complex file types.
Comparing different tools based on ease and compatibility
For basic emailing on traditional Linux systems, mail and mailx are the simplest tools. They are universally available but are not designed for modern needs. They lack built-in support for authenticating with external SMTP servers and cannot reliably handle attachments, as they depend on a pre-configured local sendmail compatible server to send messages.For modern scripting,
msmtp is the recommended tool for sending emails. It is a dedicated SMTP client designed to securely connect and authenticate with any external email service. You can configure your server settings and credentials once in a secure file, allowing your scripts to send emails reliably without exposing passwords. It is the ideal backend for any automated notification or alert.When your scripts need to send attachments, the best solution is to use
mutt in combination with msmtp. mutt excels at creating complex emails with proper MIME encoding for attachments. You use mutt’s simple command-line options to compose the email and attach files, and it then hands the final message off to msmtp for secure sending.Finally, the other tools serve niche roles.
sendmail is not a user tool but a full, complex email server engine that runs in the background. mpack is a simple utility just for encoding attachments, but its functionality is largely superseded by the more powerful and integrated capabilities of mutt.Here’s a simple breakdown to help you decide when to use which:
| Tool | Use Case | Pros | Cons |
|---|---|---|---|
mail / mailx |
Sending simple, text-only emails on a server with a pre-configured local mail system (like sendmail). |
• Universally available on all Linux/UNIX systems. | • No built-in SMTP authentication (can’t connect to Gmail). |
| • Extremely simple syntax for basic emails. | • No reliable, easy way to handle attachments. | ||
| • Depends entirely on a local mail server. | |||
msmtp |
Securely sending emails from scripts via any external SMTP server (e.g., Gmail, Office 365) that requires authentication. | • Purpose-built for authenticated SMTP. | • Requires a one-time setup of a configuration file. |
| • Securely handles credentials in a config file (no passwords in scripts). | • It only sends email; it cannot read or manage mailboxes. | ||
| • Flexible and reliable for automation. | |||
mutt |
• As an interactive terminal client for reading/writing email. | • Excellent, reliable support for MIME attachments. | • Can be complex to configure. |
| • For scripting emails with attachments. | • Highly configurable and powerful for interactive use. | • It’s a “composer,” not a “sender,” so it needs a separate tool like msmtp or sendmail to send the email. |
|
• Can be paired with msmtp for modern sending. |
|||
mpack |
A single-purpose utility to encode a file into a MIME attachment and create a basic email structure. | • Simple, lightweight, and does one thing well: encoding files for email. | • Depends on a local sendmail command to send the email. |
| • No SMTP authentication capabilities. | |||
• Functionality is mostly redundant if you use mutt. |
|||
sendmail |
Running as a system-wide Mail Transfer Agent (MTA); acting as a full email server to route and deliver all mail. | • The original, powerful, and feature-rich MTA. | • Not a user tool for sending single emails. |
| • Defines many of the standards used today. | • Configuration is notoriously complex. | ||
| • Mostly superseded by modern, easier MTAs. |
FAQs
1. What is the easiest way to send an email from the Linux terminal?
The easiest method is using themail command, part of the mailutils package (or mailx on some systems). It’s designed for quick, simple emails.Run
sudo apt-get install mailutils to install the package.To send an email, use this simple syntax:
- echo "This is the body of the email." | mail -s "Email Subject" recipient@example.com
2. Can I send emails from a script?
You can easily incorporate email commands into a shell script to automate notifications. This is useful for alerts about script completion, cron job status, or system errors.Here is an example of a simple bash script that sends an email:
#!/bin/bash

# Define email variables
RECIPIENT="admin@example.com"
SUBJECT="System Backup Report"
BODY="The system backup completed successfully on $(date)."

# Send the email
echo "$BODY" | mail -s "$SUBJECT" "$RECIPIENT"

echo "Report email sent to $RECIPIENT."
3. How do I send an email with an attachment in Linux?
While the basicmail command isn’t ideal for attachments, mutt is a much better alternative that handles them with ease.To install
mutt, run the command:- sudo apt-get install mutt
-a flag:- echo "Please find the report attached." | mutt -s "Report Attached" -a /path/to/file.zip -- recipient@example.com
Conclusion
While command-line email clients are simpler and less computationally intensive, using the right tool for the task is crucial. Basic commands like mail are excellent for local system alerts but cannot connect to external services like Gmail or Yahoo that require authentication. This limitation is overcome by using a modern client like msmtp, which is designed to securely handle SMTP authentication for sending email to any domain. For sending attachments reliably, pairing mutt with msmtp provides a powerful and scriptable solution.Although GUI clients like Thunderbird are ideal for daily email management, the command-line approach remains unmatched for automating notifications and integrating email into system administration workflows, helping you avoid problems with undelivered mail in your scripts.
Now that you can send emails from the command line, you might want to dive deeper into mail server configuration or application-level email automation. Check out these guides to continue learning:
"Anish Singh Walia" / 2025-06-20 a month ago / 未收藏/ DigitalOcean Community Tutorials/
发送到 kindle
Introduction
SSL (Secure Sockets Layer) verification is a critical security process that ensures the authenticity and integrity of encrypted connections between clients and servers. When properly implemented, SSL verification protects against man-in-the-middle attacks, ensures data privacy, and builds trust with your users.It is the process of confirming that an SSL certificate is valid, trusted, and matches the domain, ensuring secure communication.
In this tutorial, you’ll learn what SSL verification is, why it’s essential for modern web applications, and how to implement it across different platforms and services. By the end of this guide, you’ll have a working SSL-verified environment and understand how to troubleshoot common SSL verification issues.
Key Takeaways
- SSL verification is essential for secure, trusted connections between clients and servers. It involves a multi-step process, including domain validation, certificate authority validation, and certificate chain verification.
- Let’s Encrypt and Certbot provide free, automated SSL certificates. These tools simplify the SSL setup and renewal process.
- Always configure strong SSL/TLS settings and security headers to enhance security.
- Test your SSL setup with browsers, command-line tools, and online services to ensure it’s working as expected.
- Automate certificate renewal and monitor expiration to prevent service disruptions.
- Troubleshoot common issues like chain errors, mismatches, and firewall blocks to maintain a secure environment.
- Follow best practices for ongoing security and compliance to protect your users and data.
Prerequisites
Before you begin this guide, you’ll need:- A server running Ubuntu or any other Linux distribution.
- Root or
sudoprivileges on your server. - Basic familiarity with the command line.
- A domain name pointed to your server (for testing SSL configurations).
- Basic understanding of SSL/TLS concepts
What is SSL Verification?
SSL verification is a multi-step process that ensures a secure connection between a client (like a web browser or API client) and a server. Here’s how the process works:-
Server Presents Certificate: When a client initiates a secure (HTTPS) connection, the server responds by sending its SSL certificate to the client.
-
Certificate Authority (CA) Validation: The client checks whether the certificate was issued by a trusted Certificate Authority (CA) included in its trust store. If the CA is not trusted, the verification fails.
-
Domain Name Matching: The client verifies that the certificate’s Common Name (CN) or Subject Alternative Name (SAN) matches the domain it is trying to reach. This ensures the certificate is intended for the requested website.
-
Certificate Chain Verification: The client examines the entire certificate chain, making sure each certificate in the chain (from the server’s certificate up to the root CA) is valid and properly signed. The chain must be complete and unbroken.
-
Expiration and Revocation Checks: The client checks that the certificate is within its valid date range (not expired or not yet valid) and, if possible, confirms that it has not been revoked by the CA.
SSL: CERTIFICATE_VERIFY_FAILED). Only when all checks pass does the client establish a secure, trusted connection with the server.
Now let’s take a look at each of these steps in more detail.
Certificate Authority (CA) Validation
When a client (such as a browser or API consumer) connects to a server over HTTPS, it receives the server’s SSL certificate. The client then checks whether this certificate was issued by a trusted Certificate Authority (CA). Trusted CAs are organizations that have been vetted and are included in the trust stores of operating systems and browsers. Some well-known examples of trusted CAs include Let’s Encrypt, DigiCert, GlobalSign, Sectigo (formerly Comodo), and Entrust. If the certificate is not signed by a CA in the client’s trust store, the connection will be flagged as insecure, and users may see warnings or errors. This validation step helps prevent attackers from using self-signed or fraudulent certificates to impersonate legitimate sites.Domain Validation
The client ensures that the SSL certificate presented by the server matches the domain name it is trying to access. This is typically checked against the certificate’s Common Name (CN) and Subject Alternative Name (SAN) fields. If the domain in the URL does not match any of these fields, the client will reject the connection. This prevents attackers from using a certificate issued for one domain to secure another, unrelated domain.Certificate Chain Validation
SSL certificates are often issued by intermediate CAs, which are themselves trusted by root CAs. The client must verify the entire chain of trust, starting from the server’s certificate (leaf certificate), through any intermediate certificates, up to a trusted root CA. If any link in this chain is missing or invalid, the client will not trust the certificate. Properly configured servers must provide the full certificate chain during the SSL handshake to ensure clients can validate the connection.Expiration Check
Every SSL certificate has a validity period, defined by its “Not Before” and “Not After” dates. The client checks that the current date falls within this range. If the certificate is expired or not yet valid, the client will refuse the connection. Expired certificates are a common cause of SSL errors and can disrupt secure access until renewed.Revocation Status
Even if a certificate is valid and signed by a trusted CA, it may be revoked before its expiration date due to compromise or other issues. Clients may check the revocation status of a certificate using mechanisms like Certificate Revocation Lists (CRLs) or the Online Certificate Status Protocol (OCSP). If the certificate is found to be revoked, the client will terminate the connection to prevent potential security risks. Note that not all clients perform revocation checks by default, and network issues can sometimes prevent these checks from completing.
What are the Differences Between SSL Verification and SSL Encryption?
While SSL (Secure Sockets Layer) and its successor TLS (Transport Layer Security) are often discussed as a single concept, it’s important to distinguish between SSL verification and SSL encryption. Both are critical for secure communications, but they serve different purposes in the SSL/TLS protocol.- SSL Encryption ensures that the data transmitted between a client (like a browser) and a server is encrypted, making it unreadable to anyone who might intercept the traffic. This protects sensitive information such as login credentials, payment details, and personal data from eavesdroppers.
- SSL Verification is the process by which the client checks the authenticity and validity of the server’s SSL certificate. This step ensures that the client is communicating with the legitimate server and not an imposter (preventing “man-in-the-middle” attacks).
Key Differences: SSL Verification vs. SSL Encryption
| Aspect | SSL Verification | SSL Encryption |
|---|---|---|
| Purpose | Confirms the server’s identity and certificate validity | Protects data in transit from being read by unauthorized parties |
| When It Happens | During the initial SSL/TLS handshake, before data is exchanged | After a secure connection is established and verified |
| How It Works | Checks certificate chain, domain match, expiration, and revocation status | Uses cryptographic algorithms (e.g., AES, RSA) to encrypt/decrypt |
| Prevents | Man-in-the-middle attacks, impersonation, and fraud | Eavesdropping, data theft, and information leakage |
| Client Role | Validates the server’s certificate using trusted Certificate Authorities (CAs) | Encrypts outgoing data and decrypts incoming data |
| Server Role | Presents a valid certificate for verification | Encrypts outgoing data and decrypts incoming data |
| Common Errors | Certificate not trusted, expired, mismatched domain, incomplete chain | Weak ciphers, protocol downgrade attacks, misconfigured encryption |
| Tools to Test | openssl s_client, browser security warnings, SSL Labs, Certbot |
Wireshark (to confirm encryption), SSL Labs, browser padlock icon |
SSL verification establishes trust in the server’s identity, while SSL encryption ensures the privacy and integrity of the data exchanged. Both are essential for secure web communications in modern internet applications.
How Do Certificate Chains Work in SSL Verification?
When a client (such as a web browser or API consumer) connects to a server over HTTPS, it needs to verify that the server’s SSL/TLS certificate is trustworthy. This trust is established through a certificate chain—a sequence of certificates that link the server’s certificate to a trusted root authority.What Is a Certificate Chain?
A certificate chain (also known as a chain of trust) is a hierarchical sequence of digital certificates that allows a client (such as a browser or API consumer) to verify the authenticity of a server’s SSL/TLS certificate. This process is fundamental to establishing trust on the internet, ensuring that the server you’re communicating with is legitimate and not an imposter.The certificate chain is composed of several layers:
- The server (leaf) certificate: This is the certificate presented by the server you are connecting to. It is issued specifically for the domain you’re visiting (e.g.,
www.example.com). - Intermediate certificate(s): These are certificates issued by trusted Certificate Authorities (CAs) that act as intermediaries between the server certificate and the root certificate. Intermediates help distribute trust and security, allowing root CAs to remain offline and protected. There may be one or more intermediate certificates in a chain.
- The root certificate: This is the anchor of the chain, issued by a root CA. Root certificates are self-signed and are included in the trust stores of operating systems, browsers, and devices. Trust in the root CA is what ultimately allows the client to trust the entire chain.
Root CAs are highly sensitive and kept offline to minimize risk. Instead of signing server certificates directly, root CAs delegate this responsibility to intermediate CAs. This layered approach improves security and makes it easier to revoke or replace intermediates if needed, without impacting the root CA.
How does the client use the certificate chain?
When a client connects to a server, the server presents its certificate along with any necessary intermediate certificates. The client then attempts to build a chain from the server certificate up to a trusted root certificate in its local trust store. If any link in the chain is missing, invalid, or untrusted, the connection will be considered insecure.
| Layer | Purpose | Example |
|---|---|---|
| Root CA | Anchors trust; pre‑installed in OS/browser | DigiCert Global Root G2 |
| Intermediate CA | Issues end‑entity certificates | Let’s Encrypt R3 |
| Leaf Certificate | Installed on your server | www.example.com |

How Do Browsers Perform SSL Verification?
Modern web browsers follow a multi-step process to verify the security and authenticity of an SSL/TLS connection before allowing users to interact with a website. Here’s a detailed breakdown of how this process works:1. DNS Lookup: Resolving the Domain Name
When you enter a website address (e.g.,https://www.example.com) in your browser, the first step is to resolve the human-readable domain name into an IP address using the Domain Name System (DNS). This tells the browser which server to contact.2. Establishing a TCP Connection and Initiating the TLS Handshake
Once the IP address is known, the browser initiates a TCP connection to the server, typically on port 443 for HTTPS. The browser then begins the TLS handshake, which is a negotiation process to establish a secure, encrypted connection.During this handshake, the server presents its SSL/TLS certificate chain to the browser. This chain includes the server (leaf) certificate and any intermediate certificates required to link the server certificate to a trusted root certificate authority (CA).
3. Certificate Chain and Trust Validation
The browser examines the certificate chain provided by the server. It attempts to build a path from the server’s certificate up through any intermediates to a root certificate that is already trusted (pre-installed) in the browser’s or operating system’s certificate store.- If the chain is complete and valid: The browser proceeds to the next step.
- If the chain is incomplete, broken, or contains an untrusted certificate: The browser will halt the process and display a security warning.
4. Hostname Verification
The browser checks that the domain name in the address bar matches the Common Name (CN) or Subject Alternative Name (SAN) fields in the server’s certificate. This ensures that the certificate was issued specifically for the domain you are visiting and not for another site.- If the hostname matches: The process continues.
- If there is a mismatch: The browser warns the user that the certificate does not match the site, which could indicate a security risk.
5. Certificate Revocation Status Check (OCSP/CRL)
Browsers may optionally check whether the server’s certificate has been revoked before its expiration date. This is done using:- OCSP (Online Certificate Status Protocol): The browser queries the certificate authority’s OCSP server to check the certificate’s status in real time.
- CRL (Certificate Revocation List): The browser downloads a list of revoked certificates from the CA and checks if the server’s certificate is on the list.
6. Secure Page Load or Security Warning
- If all checks pass: The browser completes the TLS handshake, establishes an encrypted connection, and loads the web page securely. You’ll typically see a padlock icon in the address bar.
- If any check fails: The browser interrupts the connection and displays a prominent warning, such as “Your connection is not private” or “This site’s security certificate is not trusted.” Users are strongly discouraged from proceeding.
7. Inspecting Certificate Details
For troubleshooting or verification, you can use your browser’s developer tools (usually found under the “Security” or “Certificate” tab) to view detailed information about the SSL/TLS certificate, including the certificate chain, validity period, and issuer.In Summary:
Browsers rigorously verify SSL/TLS certificates to protect users from impersonation, eavesdropping, and other security threats. This multi-step process ensures that users only connect to legitimate, secure websites.
Here is a flowchart that summarizes the process:

What are some CLI Tools for Verifying Certificates?
There are several command-line tools that can be used to verify SSL/TLS certificates, including:openssl s_client: This tool can be used to connect to a server and verify its SSL/TLS certificate.curl --verbose: This tool can be used to download a website and verify its SSL/TLS certificate.openssl verify: This tool can be used to verify the server certificate against the provided certificate chain.
1. openssl s_client
Command: openssl s_client -connect example.com:443 -servername example.com -showcertsExplanation:
openssl s_client is a command-line tool that allows you to connect to a server using SSL/TLS and verify its certificate. The parameters used in this command are:-connect example.com:443: This parameter specifies the server to connect to, including its domain name and port number (443 is the default port for HTTPS). In this case, we’re connecting toexample.comon port 443.-servername example.com: This parameter specifies the server name indication (SNI) extension to use during the TLS handshake. SNI allows a server to present multiple certificates on the same IP address and port number, based on the domain name requested by the client. In this case, we’re indicating that we want to connect toexample.com.-showcerts: This parameter tellsopensslto display the entire certificate chain sent by the server, including the server certificate and any intermediate certificates.
OutputCONNECTED(00000003)
depth=2 C = US, O = DigiCert Inc, OU = www.digicert.com, CN = DigiCert SHA2 Secure Server CA
verify return:1
depth=1 C = US, O = DigiCert Inc, OU = www.digicert.com, CN = RapidSSL TLS DV RSA CA G1
verify return:1
depth=0 C = US, ST = California, L = San Francisco, O = "Facebook, Inc.", CN = example.com
verify return:1
---
Certificate chain
 0 s:/C=US/ST=California/L=San Francisco/O=Facebook, Inc./CN=example.com
   i:/C=US/O=DigiCert Inc/OU=www.digicert.com/CN=RapidSSL TLS DV RSA CA G1
 1 s:/C=US/O=DigiCert Inc/OU=www.digicert.com/CN=RapidSSL TLS DV RSA CA G1
   i:/C=US/O=DigiCert Inc/OU=www.digicert.com/CN=DigiCert SHA2 Secure Server CA
 2 s:/C=US/O=DigiCert Inc/OU=www.digicert.com/CN=DigiCert SHA2 Secure Server CA
   i:/C=US/O=DigiCert Inc/OU=www.digicert.com/CN=DigiCert Global Root CA
---
Server certificate
-----BEGIN CERTIFICATE-----
MIIF...
-----END CERTIFICATE-----
subject=/C=US/ST=California/L=San Francisco/O=Facebook, Inc./CN=example.com
issuer=/C=US/O=DigiCert Inc/OU=www.digicert.com/CN=RapidSSL TLS DV RSA CA G1
---
No client certificate CA names sent
Peer signing digest: SHA256
Server Temp Key: ECDH, P-256, 256 bits
---
SSL handshake has read 3053 bytes and written 305 bytes
---
New, TLSv1/SSLv3, Cipher is ECDHE-RSA-AES256-GCM-SHA384
Server public key is 2048 bit
Secure Renegotiation IS supported
Compression: NONE
Expansion: NONE
No ALPN, server accepted to use http/1.1
---
verify return:1 lines indicate that each certificate in the chain was successfully verified. The certificate details, such as the subject and issuer, are also displayed.2. curl --verbose
Command: curl https://example.com -vExplanation:
curl is a command-line tool for transferring data to and from a web server using HTTP, HTTPS, SCP, SFTP, TFTP, and more. The parameters used in this command are:https://example.com: This is the URL of the server we’re connecting to.-v: This parameter increases the output verbosity, allowing us to see more details about the connection process, including SSL/TLS verification.
* About to connect() to example.com port 443 (#0)
*   Trying 192.0.2.1...
* Connected to example.com (192.0.2.1) port 443 (#0)
* Initializing NPN, negotiated protocol: h2
* ALPN, server accepted to use h2
* Using HTTP2, server supports multi-plexing
> GET / HTTP/2
> Host: example.com
> User-Agent: curl/7.64.0
> Accept: */*
>
< HTTP/2 200
< content-type: text/html; charset=UTF-8
<
<!DOCTYPE html>
...
* Connection #0 to host example.com left intact
3. openssl verify
Command: openssl verify -CAfile chain.pem server.pemExplanation:
openssl verify is a command-line tool that verifies the certificate chain of a server certificate against a set of trusted certificates. The parameters used in this command are:-CAfile chain.pem: This parameter specifies the file containing the trusted certificate chain. You can obtain the trusted certificate chain from the Certificate Authority (CA) that issued your server certificate. This file should contain the root certificate and any intermediate certificates in PEM format.server.pem: This is the file containing the server certificate to be verified. You can obtain the server certificate from your Certificate Authority or from your server’s SSL/TLS configuration. This file should contain the server certificate in PEM format.
- Check your server’s SSL/TLS configuration files or directories for the server certificate and intermediate certificates. These files are usually named
server.pem,server.crt, orserver.key. - If you have access to your Certificate Authority’s documentation or support, you can request the trusted certificate chain from them. They may provide you with a bundle of certificates in PEM format.
- If you’re using a service like Let’s Encrypt, you can find the trusted certificate chain in the
fullchain.pemfile generated during the certificate issuance process. - Ensure that both the
chain.pemandserver.pemfiles are in PEM format and contain the correct certificates for verification.
Outputserver.pem: OK
Note: The
chain.pem file should contain the trusted certificate chain in PEM format, including the root certificate and any intermediate certificates. The server.pem file should contain the server certificate to be verified, also in PEM format.
You can refer to these tutorials for more information on how to install and configure SSL Certificated with Let’s Encrypt with Certbot:
What are Online SSL Testing Tools?
Online SSL testing tools are essential for verifying the security and configuration of your SSL/TLS certificates. These tools provide a comprehensive analysis of your SSL setup, identifying potential vulnerabilities and offering recommendations for improvement. By utilizing these services, you can ensure your website or application is properly secured, maintaining the trust of your users and protecting sensitive data.Here are two popular online SSL testing tools to verify your configuration:
- SSL Labs: Visit
https://www.ssllabs.com/ssltest/and enter your domain to receive a detailed report on your SSL configuration, including the grade of your SSL implementation, supported protocols, and cipher suites. - SSL Checker: Use online SSL certificate checker from DigiCert is useful to verify the installation and configuration of your SSL certificates. These tools can detect issues such as certificate expiration, incorrect installation, or misconfigured intermediate certificates.
How to Enable SSL Verification in Application Code?
Enabling SSL verification in application code is crucial for ensuring that your application only communicates with trusted servers. This process involves configuring your application to verify the authenticity of the server’s SSL/TLS certificate before establishing a connection. Here’s a step-by-step guide to enable SSL verification in your application code:Enabling SSL Verification in Python
In Python, you can enable SSL verification using therequests library. The following code snippet demonstrates how to make a GET request to a secure API endpoint (https://api.example.com) with SSL verification enabled:import requests
# Make a GET request to the API endpoint with a timeout of 10 seconds
resp = requests.get('https://api.example.com', timeout=10)
# Print the status code of the response
print(resp.status_code)
requests library verifies SSL certificates. This means that if the SSL certificate of the API endpoint is invalid or not trusted, the request will fail with an SSL verification error.Enabling SSL Verification in Node.js
In Node.js, you can enable SSL verification using theaxios library. The following code snippet demonstrates how to make a GET request to a secure API endpoint (https://api.example.com) with SSL verification enabled, handling both successful and failed verification scenarios:const axios = require('axios');
// Create a new instance of the https.Agent with SSL verification enabled
const agent = new (require('https').Agent)({ rejectUnauthorized: true });
// Define a function to handle the request
function makeSecureRequest() {
axios.get('https://api.example.com', { httpsAgent: agent })
.then(response => {
console.log(`Request successful. Status: ${response.status}`);
// Handle successful response
})
.catch(error => {
console.error(`Request failed. Error: ${error.message}`);
// Handle failed request
});
}
// Call the function to make the request
makeSecureRequest();
Additionally, you can further enhance this example by adding more advanced error handling, such as distinguishing between SSL verification errors and other types of errors. This can be achieved by checking the error object’s properties, like
error.code, to determine the cause of the failure.For instance, if the SSL verification fails due to an invalid or untrusted certificate, the error object might contain a code like
ECONNRESET or ENOTFOUND. You can use this information to provide more specific error messages or take appropriate actions based on the error type.Here’s an updated example that includes advanced error handling:
const axios = require('axios');

// Create a new instance of the https.Agent with SSL verification enabled
const agent = new (require('https').Agent)({ rejectUnauthorized: true });

// Define a function to handle the request
function makeSecureRequest() {
  axios.get('https://api.example.com', { httpsAgent: agent })
    .then(response => {
      console.log(`Request successful. Status: ${response.status}`);
      // Handle successful response
    })
    .catch(error => {
      if (error.code === 'ECONNRESET' || error.code === 'ENOTFOUND') {
        console.error(`SSL verification failed. Error: ${error.message}`);
        // Handle SSL verification failure
      } else {
        console.error(`Request failed. Error: ${error.message}`);
        // Handle other types of errors
      }
    });
}

// Call the function to make the request
makeSecureRequest();
In this example, we create a new instance of the
https.Agent with rejectUnauthorized set to true, which enables SSL verification. We then pass this custom agent to the axios.get method to make the request. If the SSL certificate of the API endpoint is invalid or not trusted, the request will fail with an SSL verification error.
How to Handle Self-Signed Certificates Securely?
Self-signed certificates are certificates that are not issued by a trusted Certificate Authority (CA). They are often used for testing purposes or for internal networks. However, they can pose a security risk if not handled properly.Here are some best practices for handling self-signed certificates securely:
- Use them only for internal or testing purposes: Self-signed certificates should not be used for public-facing websites or applications that require high security.
- Implement a secure certificate management process: Ensure that self-signed certificates are properly managed, including secure storage, access control, and revocation procedures.
- Use a secure protocol: Ensure that the connection to the server or application using a self-signed certificate is encrypted using a secure protocol like TLS 1.2 or TLS 1.3.
- Inform users about the self-signed certificate: If a self-signed certificate is used for a public-facing application, inform users about the potential security risks and provide them with instructions on how to proceed safely.
- Use a trusted CA for production environments: For production environments, use certificates issued by a trusted Certificate Authority to ensure the highest level of security and trust.
- Regularly review and update self-signed certificates: Regularly review and update self-signed certificates to ensure they are not expired or compromised.
- Use a secure method for certificate distribution: Use a secure method to distribute self-signed certificates to clients or users, such as through a secure network or encrypted channel.
- Monitor for certificate validation errors: Monitor for certificate validation errors and take prompt action to address any issues that arise.
- Document self-signed certificate usage: Document the use of self-signed certificates, including their purpose, scope, and management procedures.
Best Practices for SSL Verification
- Always use certificates from trusted Certificate Authorities (CAs): Ensure that the certificates used are issued by a trusted Certificate Authority (CA) to establish trust with clients and prevent man-in-the-middle attacks.
- Automate certificate renewal and monitor expiration: Implement a process to automatically renew certificates before they expire to prevent service disruptions and ensure continuous encryption.
- Use strong protocols (TLS 1.2/1.3) and ciphers: Utilize the latest Transport Layer Security (TLS) protocols (1.2 and 1.3) and strong ciphers to ensure secure data transmission and protect against known vulnerabilities.
- Implement security headers (HSTS, CSP, etc.): Configure security headers such as HTTP Strict Transport Security (HSTS), Content Security Policy (CSP), and others to enhance the security of your application and protect against common web attacks.
- Regularly test your SSL configuration with tools like SSL Labs: Periodically test your SSL configuration using tools like SSL Labs to identify vulnerabilities, ensure compliance with best practices, and optimize your SSL setup.
- Keep your server and libraries up to date: Regularly update your server and libraries to ensure you have the latest security patches and features, which helps prevent known vulnerabilities and ensures ongoing security.
- Document and inventory all certificates in use: Maintain a record of all certificates used, including their purpose, expiration dates, and revocation status, to ensure easy management and timely renewal or revocation.
What are some Common Mistakes When Enabling SSL Verification?
| Mistake | Impact | How to Avoid |
|---|---|---|
| Disabling verification | Leaves connection open to MITM attacks | Use a trusted CA bundle or pin certificates instead of bypassing verification |
| Incorrect system date/time | Certificates appear expired or not yet valid | Enable NTP or set time manually before troubleshooting |
| Using outdated TLS/SSL versions | Client/server handshake fails, protocol_version errors | Disable SSL 3.0/TLS 1.0 on servers; upgrade clients to TLS 1.2+ |
| Hostname mismatch | Browser shows “Certificate does not match domain” | Regenerate the certificate with correct CN/SAN entries |
| Missing intermediate CA | CERTIFICATE_VERIFY_FAILED on some clients | Always install the full chain (leaf + intermediate) on the server |
| Antivirus HTTPS scanning | Intercepts certificates, causes trust‑store mismatch | Disable HTTPS inspection or add the AV root cert to client trust store |
| Mixing HTTP and HTTPS resources | Mixed‑content warnings or blocked scripts | Serve all assets over HTTPS or use CSP/upgrade‑insecure‑requests |
| Ignoring revocation checks (OCSP/CRL) | Clients may trust a revoked cert | Enable OCSP stapling on servers and keep revocation endpoints reachable |
Tip: Browser messages differ: Chrome shows
ERR_CERT_COMMON_NAME_INVALID for hostname issues, while Firefox reports SEC_ERROR_UNKNOWN_ISSUER for untrusted CAs. Always note the exact code when diagnosing.How to fix SSL: CERTIFICATE_VERIFY_FAILED error?
The SSL: CERTIFICATE_VERIFY_FAILED error occurs when the client (e.g., a web browser or API client) fails to verify the authenticity of the server’s SSL certificate. This error can be caused by various reasons such as:- The server’s SSL certificate is expired or not yet valid.
- The server’s SSL certificate is not trusted by the client.
- The server’s SSL certificate does not match the domain name of the server.
- The server’s SSL certificate is missing intermediate certificates.
- The server’s SSL certificate has been revoked.
-
Check the server’s SSL certificate expiration:
- Use tools like OpenSSL to check the certificate’s expiration date:
openssl x509 -in server.crt -noout -dates - If the certificate is expired, renew it with a trusted Certificate Authority (CA) by following their renewal process.
- Use tools like OpenSSL to check the certificate’s expiration date:
-
Verify the server’s SSL certificate trust:
- Check the certificate’s issuer to ensure it is a trusted CA:
openssl x509 -in server.crt -noout -issuer - Verify the certificate is properly configured on the server by checking the server’s SSL configuration files.
- If the certificate is not trusted, consider obtaining a new certificate from a trusted CA by following their issuance process.
- Check the certificate’s issuer to ensure it is a trusted CA:
-
Check the server’s SSL certificate domain name:
- Verify the certificate’s subject to ensure it matches the domain name of the server:
openssl x509 -in server.crt -noout -subject - If the domain name does not match, obtain a new certificate with the correct domain name by following the CA’s issuance process.
- Verify the certificate’s subject to ensure it matches the domain name of the server:
-
Check for missing intermediate certificates:
- Use tools like OpenSSL to verify the certificate chain:
openssl s_client -connect server:443 -servername server - If intermediate certificates are missing, obtain them from the CA and configure them on the server by updating the SSL configuration files.
- Use tools like OpenSSL to verify the certificate chain:
-
Check the server’s SSL certificate revocation status:
- Use tools like OpenSSL to check the certificate’s revocation status:
openssl ocsp -issuer server.crt -cert server.crt -url http://ocsp.example.com - If the certificate is revoked, obtain a new certificate by following the CA’s issuance process.
- Use tools like OpenSSL to check the certificate’s revocation status:
SSL: CERTIFICATE_VERIFY_FAILED error, ensuring a secure connection between the client and server.What are some Common SSL Verification Errors & Fixes?
| Error Message | Likely Cause | Quick Fix | Additional Context |
|---|---|---|---|
SSL: CERTIFICATE_VERIFY_FAILED (Python) |
Missing intermediate CA | Install full chain or update certifi | This error occurs when the Python application cannot verify the SSL certificate due to a missing intermediate certificate. Ensure the full certificate chain is installed or update the certifi package to include the intermediate CA. To update certifi, run pip install --upgrade certifi. |
curl: (60) SSL certificate problem |
Expired or self‑signed cert | Renew cert or add --cacert path | This error is triggered by curl when it encounters an SSL certificate problem, such as an expired or self-signed certificate. To resolve this, either renew the certificate or specify the path to a trusted CA certificate using the --cacert option. For example, curl -v --cacert /path/to/trusted/ca/cert.pem https://example.com. |
javax.net.ssl.SSLHandshakeException |
Hostname mismatch | Regenerate cert with correct SAN | This Java-specific error indicates a hostname mismatch between the SSL certificate and the domain name. To fix this, regenerate the SSL certificate with the correct Subject Alternative Names (SAN) to match the domain name. Ensure the SAN includes all necessary domain names and subdomains. |
SSL peer verification failed |
Client trust store outdated | Update OS or add CA bundle | This error occurs when the client’s trust store is outdated, causing SSL peer verification to fail. Update the operating system or add the necessary CA bundle to the trust store to resolve this issue. For example, on Ubuntu, run sudo apt update && sudo apt full-upgrade to update the OS and trust store. |
FAQs
1. What Is SSL Verification?
SSL verification is the process of checking the authenticity of a website’s SSL certificate to ensure it is valid, trusted, and matches the domain name. This verification is crucial for establishing a secure connection between a client (e.g., a web browser) and a server, protecting data from interception and tampering.To verify SSL verification, you can use tools like OpenSSL to check the certificate’s details. For example, to check the certificate’s expiration date, you can use the following command:
openssl s_client -connect example.com:443 -servername example.com | openssl x509 -noout -dates
2. Why do I get SSL verification failed errors?
SSL verification failed errors occur when the client (e.g., a web browser) cannot verify the authenticity of the server’s SSL certificate. This can happen due to various reasons such as an expired or invalid certificate, a mismatch between the certificate and the domain name, or the certificate not being trusted by the client.To fix SSL verification errors, you can try the following steps:
- Check the certificate’s expiration date using
openssl x509 -in server.crt -noout -datesand renew it if it’s expired. - Verify the certificate’s domain name matches the server’s domain using
openssl x509 -in server.crt -noout -subjectand obtain a new certificate if there’s a mismatch. - Ensure the certificate is trusted by the client by checking if the Certificate Authority (CA) is included in the client’s trust store. You can use
openssl x509 -in server.crt -noout -issuerto check the certificate’s issuer. - If the certificate is not trusted, consider obtaining a new certificate from a trusted CA by following their issuance process.
- Use tools like OpenSSL to verify the certificate chain and identify any missing intermediate certificates:
openssl s_client -connect server:443 -servername server. If intermediate certificates are missing, obtain them from the CA and configure them on the server by updating the SSL configuration files. - Check the certificate’s revocation status using
openssl ocsp -issuer server.crt -cert server.crt -url http://ocsp.example.comand obtain a new certificate if it’s revoked.
3. Can I disable SSL verification in curl or Python?
Yes, it is technically possible to disable SSL verification in curl or Python, but it is strongly discouraged as it compromises the security of the connection. Disabling SSL verification makes the connection vulnerable to man-in-the-middle attacks, allowing an attacker to intercept and read the data being transmitted. Instead, it is recommended to resolve the underlying SSL verification issues or use a trusted certificate.Example of how to disable SSL verification in curl (not recommended):
curl -k https://example.com
-k flag tells curl to skip SSL verification and proceed with the request regardless of the certificate’s validity. This is not recommended for production use, as it compromises the security of the connection.Example of how to disable SSL verification in Python (not recommended):
import requests

requests.get('https://example.com', verify=False)
verify=False parameter tells the requests library to skip SSL verification and proceed with the request regardless of the certificate’s validity. This is not recommended for production use, as it compromises the security of the connection.4. How do I verify an SSL certificate manually?
To verify an SSL certificate manually, you can follow these steps:- Check the certificate’s expiration date to ensure it is not expired.
- Verify the certificate’s issuer to ensure it is a trusted Certificate Authority (CA).
- Check the certificate’s subject to ensure it matches the domain name of the website.
- Use tools like OpenSSL or SSL Labs to scan the website’s SSL configuration and identify any potential issues.
openssl s_client -connect example.com:443
example.com on port 443) and displays information about the SSL certificate, including the issuer, subject, and expiration date.5. Is SSL verification required for secure APIs?
Yes, SSL verification is essential for secure APIs. SSL verification ensures that the API endpoint’s SSL certificate is valid, trusted, and matches the domain name, which is critical for protecting sensitive data transmitted between the client and the server. Without SSL verification, the connection is vulnerable to attacks, compromising the security and integrity of the data.
Conclusion
SSL verification is a crucial aspect of securing web traffic, as it not only ensures encryption but also establishes trust between the client and server. By grasping the intricacies of SSL verification, implementing it in your tools and code, and resolving common issues that may arise, you safeguard your applications and users from the risks of man-in-the-middle (MITM) attacks.- How to Troubleshoot SSL Protocol Errors: This tutorial provides a comprehensive guide on identifying and resolving SSL protocol errors, ensuring secure connections between clients and servers.
- OpenSSL Essentials: Working with SSL Certificates, Private Keys, and CSRs: This tutorial covers the fundamental concepts and practical applications of OpenSSL, including certificate management, key generation, and certificate signing requests.
- Steps to Configure SSL on Tomcat and Setup Auto-Redirect from HTTP to HTTPS: This tutorial outlines the process of configuring SSL/TLS on Apache Tomcat, including setting up automatic redirects from HTTP to HTTPS, ensuring secure communication for web applications.
- How to Create a Self-Signed SSL Certificate for Nginx in Ubuntu: This guide demonstrates the creation and configuration of self-signed SSL certificates for Nginx on Ubuntu, providing a basic level of encryption and authentication for web servers.
"Vinayak Baranwal" / 2025-06-20 a month ago / 未收藏/ DigitalOcean Community Tutorials/
发送到 kindle
Introduction
If you’ve ever encountered a .class file and wished you could read its original source code, you’re not alone. Whether you’re debugging legacy code, performing security audits, or reverse-engineering applications for learning, a Java decompiler is your go-to tool.In this in-depth guide, we’ll walk you through everything you need to know about Java decompilers—from how Java compilation works to the best tools for decompiling
.class files. Whether you’re a beginner or a seasoned developer, this article is designed to provide practical insights and technical depth.
What is a Java Decompiler?
A Java decompiler is a utility that converts Java bytecode (compiled .class files) back into readable Java source code. Essentially, it reverses the compilation process, allowing developers to reconstruct source code from compiled Java programs.Think of it as the “undo” button for Java compilation—while not always perfect, it often provides a clear enough picture for developers to understand the original logic.
How the Java Compilation Process Works
When you write Java code and save it as a .java file, you’re only halfway there. That source file needs to be converted into bytecode before it can run on the Java Virtual Machine (JVM). Here’s how it works:- Source Code (
.java): You write your Java program. - Compilation (
javac): The Java compiler (javac) translates the source code into Java bytecode (.classfiles). - Execution (JVM): The JVM reads and executes these bytecode files across platforms.
If you’re just getting started, check out our guide on how to write your first program in Java for a hands-on walkthrough.
Java Compiler vs Interpreter
Understanding the distinction between Java’s compilation and interpretation phases is crucial for developers. While both processes work together to execute Java programs, they serve fundamentally different purposes in the Java execution model.| Aspect | Java Compiler (javac) |
Java Interpreter (JVM) |
|---|---|---|
| Function | Translates source code to bytecode | Executes bytecode |
| Output | .class files |
Program output |
| Speed | Fast for translation | Runtime execution can be slower |
| Tool | javac |
Java Virtual Machine (JVM) |
| Processing Time | One-time compilation phase | Continuous runtime execution |
| Error Detection | Compile-time errors and warnings | Runtime exceptions and errors |
| Platform Dependence | Platform-independent bytecode | Platform-specific execution |
| Memory Usage | Minimal during compilation | Varies based on program requirements |
| Optimization Level | Basic compile-time optimizations | Advanced JIT and runtime optimizations |
| Debugging Support | Source-level debugging information | Runtime debugging and profiling |
| Deployment | Requires compilation before execution | Direct bytecode execution |
What is Java Bytecode?
Bytecode is the intermediate representation of your Java program. It is a low-level, platform-independent set of instructions that the JVM can understand and execute. Think of it as a universal language that bridges the gap between human-readable Java source code and machine-specific instructions.Example bytecode snippet (generated by
javac):javac HelloWorld.java
// Decompiled version (simplified)
public class HelloWorld {
    public static void main(String[] args) {
        System.out.println("Hello, World!");
    }
}
What is the Role of the JVM (Java Virtual Machine)?
The Java Virtual Machine (JVM) plays a central role in running Java programs. It:For a breakdown of how the JDK, JRE, and JVM differ, refer to our guide on differences between jdk, jre, and jvm.
- Loads compiled
.classfiles from the file system into memory for execution and processing by the JVM runtime environment - Verifies bytecode integrity through comprehensive security checks to ensure the code hasn’t been tampered with or corrupted during transmission
- Executes the program via interpretation or JIT compilation depending on performance requirements and execution frequency patterns
- Provides runtime services including automatic memory management through garbage collection and multi-threading capabilities for concurrent execution
.class files would be unreadable and unexecutable on your system.
How Java Decompilation Works
Decompilation in Java involves parsing bytecode and reconstructing equivalent Java source code. While it’s rarely a perfect reconstruction (comments, original variable names, and formatting are lost), it does a solid job for:-
Debugging obfuscated classes: When dealing with intentionally obfuscated Java bytecode, decompilers help reverse-engineer the original logic by converting complex, unreadable bytecode back into understandable Java source code, making it possible to identify bugs, security vulnerabilities, or understand the program’s behavior despite deliberate obfuscation techniques.
-
Recovering lost source code: In situations where original source code has been accidentally deleted, corrupted, or is no longer available, decompilers can reconstruct a functional approximation of the original Java code from compiled
.classfiles, allowing developers to restore or recreate their applications when the source code repository is inaccessible or incomplete.
-
Analyzing malicious code: Security researchers and malware analysts use decompilers to examine potentially harmful Java applications by converting their compiled bytecode into readable source code, enabling detailed analysis of the code’s behavior, identification of security threats, and understanding of how malicious software operates to develop appropriate countermeasures and security patches.
-
Learning how libraries work internally: Developers can use decompilers to explore the internal implementation of third-party libraries and frameworks by examining their compiled bytecode, gaining insights into design patterns, algorithms, and coding techniques used by experienced developers, which helps improve their own programming skills and understanding of complex software architectures.
Process Overview
- Parse
.classfile structure (constant pool, methods, fields) - Map bytecode instructions to Java equivalents
- Generate syntactically correct Java code
- Output source code for viewing or editing
Best Java Decompiler Tools
| Tool | Type | Highlights |
|---|---|---|
| JD-GUI | GUI Tool | Lightweight, fast, ideal for inspection |
| Fernflower | Command-line/IDE | Used in IntelliJ IDEA, open-source |
| CFR | CLI/GUI | Handles modern Java features well |
| Procyon | CLI/Lib | Great for Java 8+, lambda expressions |
| JADX | Android Tool | Decompiles .dex and .class files |
Tip: If you use IntelliJ IDEA or Eclipse, plugins like Fernflower and Enhanced Class Decompiler make the process seamless.
Online Java Decompiler Tools
Need something quick and accessible? Online Java decompilers let you view the contents of .class files without downloading any software. These tools are especially useful for quick inspections, educational purposes, or when you’re working on a system where you can’t install desktop software.Popular options include:
- http://javadecompilers.com/ — Supports multiple decompilers and batch uploads.
- https://bytecodeviewer.com/ — Offers interactive UI and supports both
.classand.jarfiles. - https://www.decompiler.com/ — Lightweight and fast, suitable for quick decompilation.
How to Use the javac Command (with Examples)
The javac Command (with Examples)javac command is the official Java compiler that transforms human-readable .java source files into platform-independent bytecode (.class files). It’s part of the Java Development Kit (JDK) and serves as the foundation for all Java development workflows.javac MyProgram.java
MyProgram.java and generates a corresponding MyProgram.class bytecode file.To compile multiple files in the current directory:
javac *.java
.java files at once, useful when your program spans multiple source files.To specify an output directory for the compiled
.class files:javac -d out/ MyProgram.java
-d flag tells javac to place the compiled .class file in the out/ directory, helping organize build artifacts.To include debugging information (useful for IDEs and debuggers):
javac -g MyProgram.java
.class file, including line numbers and variable names, enabling advanced debugging.Finally, to run the compiled program using the JVM:
java MyProgram
MyProgram class using the Java Virtual Machine. Ensure you’re in the directory containing MyProgram.class, or adjust the classpath accordingly.
Common Java Compilation Errors and How to Fix Them
When compiling Java code, it’s not uncommon to encounter errors. Understanding these errors and how to resolve them is crucial for efficient development. Here are some common Java compilation errors, their causes, and steps to fix them:| Error | Cause | Fix |
|---|---|---|
cannot find symbol |
Variable/method not declared | Declare or import missing elements |
class not found |
Typo in class name or path | Check class path and filenames |
package does not exist |
Missing import or library | Include correct import statement or dependency |
main method not found |
No entry point | Add public static void main(String[] args) |
| Syntax errors | Typos or missing semicolons/brackets | Proofread the code |
Java Compiler in JDK vs IDE-Based Compilers
Java compilers come in two primary flavors: the JDK compiler (javac) and IDE-based compilers like those found in Eclipse or IntelliJ. Each has its strengths and weaknesses, making them suitable for different use cases. Here’s a comparison of these compilers:| Feature | JDK Compiler (javac) |
IDE Compiler (Eclipse/IntelliJ) |
|---|---|---|
| Platform | Command-line | GUI-based |
| Compilation Speed | Slightly slower | Optimized for speed with caching |
| Feedback | Post-compilation | Real-time syntax checking |
| Integration | Manual build steps | Automated builds and refactoring |
javac and an IDE compiler depends on your project needs. For automation and scripting tasks, the javac compiler is ideal due to its command-line interface and flexibility. On the other hand, IDE compilers are better suited for ease of use and productivity, offering features like real-time syntax checking and automated builds.
Java Compiler in CI/CD Pipelines
In CI/CD workflows, the Java compiler plays a critical role in building and packaging applications. Typical pipeline step:steps:
- name: Compile Java Code
run: javac -d build/ src/**/*.java
Tools like Jenkins, GitHub Actions, and GitLab CI/CD all support Java build pipelines using:
javacfor compilationJUnitfor testingMavenorGradlefor packaging
Common Mistakes Developers Make
-
Ignoring Compilation Flags:
javachas flags for warnings, debugging, and optimizations. Use them. Many developers overlook powerful flags like-Xlint:allfor comprehensive warnings,-gfor debugging information, and-Ofor optimizations that can significantly improve code quality and performance during development cycles.
-
Forgetting JVM’s Role: Compilation isn’t enough. Understanding JVM memory and threading models is vital. Developers often focus solely on compilation without considering how the JVM will execute their bytecode, leading to performance issues, memory leaks, and unexpected behavior in production environments where JVM tuning becomes critical.
-
Not Using Versioning: Compiling with mismatched JDK and runtime versions can break things. This common oversight occurs when developers use different Java versions for compilation versus runtime, causing compatibility issues, missing features, or runtime errors that are difficult to diagnose and resolve in complex deployment scenarios.
-
Skipping Decompilation in Debugging: Decompiled
.classfiles can reveal a lot about third-party bugs or integrations. For example, if you’re working with a closed-source JAR file that’s throwing unexpectedNullPointerExceptions, you can use a decompiler like CFR to inspect the class structure and method implementations. This may help uncover missing null checks, improperly initialized variables, or logic errors in third-party code that aren’t documented publicly. Decompilation can turn opaque bytecode into actionable insights.
Frequently Asked Questions
Q1: What is the Java compiler used for?A: The Java compiler (
javac) serves as the primary translation tool that converts human-readable Java source code written in .java files into platform-independent bytecode stored in .class files. This bytecode can then be executed by the Java Virtual Machine (JVM) on any platform that supports Java, enabling the “write once, run anywhere” principle that makes Java applications portable across different operating systems and hardware architectures.Q2: What command is used to compile a Java program?
A: To compile a Java program, you use the
javac command followed by the filename with the .java extension. The basic syntax is javac <filename>.java in your terminal or command prompt. For example, to compile a file named HelloWorld.java, you would run javac HelloWorld.java. This command reads your source code, performs syntax checking, and generates corresponding .class files containing the compiled bytecode that the JVM can execute.Q3: Can I use an online Java compiler?
A: Yes, there are numerous online Java compilers and development environments available that allow you to write, compile, and run Java code directly in your web browser without installing any software locally. Popular options include JDoodle, Repl.it, Programiz, and javadecompilers.com. These platforms provide browser-based environments with syntax highlighting, error checking, and instant compilation capabilities, making them convenient for learning, testing small code snippets, or demonstrating Java concepts without setting up a local development environment.
Q4: What’s the difference between a compiler and interpreter in Java?
A: In Java, the compiler (
javac) and interpreter (JVM) serve distinct but complementary roles in the execution process. The compiler translates your entire Java source code into bytecode during the compilation phase, performing syntax analysis, type checking, and optimization. The interpreter, represented by the JVM, then reads and executes this bytecode at runtime, either by interpreting it directly or using just-in-time (JIT) compilation to convert frequently executed bytecode into native machine code for better performance.Q5: How does the Java compiler handle different Java versions and backward compatibility?
A: The Java compiler uses the
-source and -target flags to control compilation for specific Java versions. The -source flag specifies which Java language version the source code should be compiled as, while -target determines the minimum JVM version required to run the compiled bytecode. For example, javac -source 8 -target 8 compiles code compatible with Java 8. This allows developers to write code using newer language features while ensuring compatibility with older JVM versions, though some features may require runtime checks or alternative implementations for backward compatibility.Q6: What are the key optimization techniques used by the Java compiler?
A: The Java compiler (
javac) performs several optimization phases during compilation, including constant folding (evaluating constant expressions at compile time), dead code elimination (removing unreachable code), method inlining (replacing method calls with the actual method body for small methods), and loop optimizations. However, most significant optimizations occur at runtime through the JVM’s Just-In-Time (JIT) compiler, which can perform advanced optimizations like escape analysis, loop unrolling, and adaptive compilation based on runtime profiling data.Q7: How does the Java compiler handle generics and type erasure?
A: The Java compiler implements generics through type erasure, a process where generic type information is removed during compilation and replaced with type casts and bridge methods. For example,
List<String> becomes List at runtime, with the compiler inserting appropriate type checks. This approach maintains backward compatibility with pre-generics Java code while providing compile-time type safety. The compiler also generates synthetic bridge methods to ensure proper method overriding when generic types are involved in inheritance hierarchies.Q8: What role does the classpath play in Java compilation and how does the compiler resolve dependencies?
A: The classpath is a crucial parameter that tells the Java compiler where to find classes and packages during compilation. It can be set using the
-cp or -classpath flag, or through the CLASSPATH environment variable. The compiler searches the classpath in order to resolve imports, inheritance relationships, and method calls. When compiling multiple files, the compiler must be able to find all referenced classes either in the source files being compiled or in the classpath. This dependency resolution happens during the compilation phase, and missing dependencies result in “cannot find symbol” errors.Q9: How does the Java compiler handle annotation processing and what are its implications for build tools?
A: The Java compiler supports annotation processing through the Annotation Processing Tool (APT) API, allowing custom processors to generate code, validate annotations, or perform other compile-time operations. This feature is widely used by frameworks like Lombok, MapStruct, and Spring for code generation. The compiler can run multiple rounds of annotation processing, where generated code may trigger additional processing. Build tools like Maven and Gradle integrate with this system through the
-processorpath flag and can configure annotation processors as dependencies, making them essential for modern Java development workflows.
Conclusion
Java decompilers are indispensable tools for any Java developer working with compiled .class files. Whether you’re debugging, reverse engineering, or learning, understanding how Java compilation and decompilation works will make you a more effective and insightful developer.For further exploration, check out these tutorials:
"Adrien Payong" / 2025-06-20 a month ago / 未收藏/ DigitalOcean Community Tutorials/
发送到 kindle
Introduction
Modern artificial intelligence relies on neural networks to analyze patterns and make smart decisions. This guide will provide a fundamental explanation of neural networks, including their working principles and training techniques.We will explore critical neural network concepts such as neurons, layers, activation functions, and backpropagation through examples(like the XOR problem and MNIST handwritten digit recognition). Along the way, we’ll compare different types of neural networks while pointing out typical training errors and addressing popular questions to assist you in your deep learning journey.
Key Takeaways
- Neural networks mimic the human brain to process and learn from data, forming the backbone of modern AI systems.
- Core components include:
- Input layer – receives raw data features.
- Hidden layers – process inputs through weighted connections and activation functions.
- Output layer – produces final predictions or classifications.
- Weights and biases – adjust during training to minimize error.
- Activation functions – introduce non-linearity (e.g., ReLU, sigmoid).
- Loss function – measures how far predictions are from actual values.
- Optimizer – updates weights to reduce loss (e.g., SGD, Adam).
- Training involves forward and backward propagation, where the model iteratively adjusts weights to minimize prediction error.
- Hyperparameter tuning and data preprocessing are critical for optimizing performance and avoiding overfitting.
- Neural networks power real-world applications like image recognition, natural language processing, and recommendation systems.
- Types of neural networks serve different purposes:
- Feedforward Neural Networks (FFNNs) – simplest form, where data flows one way.
- Convolutional Neural Networks (CNNs) – excel in image and spatial data analysis.
- Recurrent Neural Networks (RNNs) – designed for sequential data like time series or text.
- Understanding the building blocks—layers, activation functions, loss functions— lays the foundation for exploring advanced AI models.
Prerequisites
- Understand basic mathematical structures such as vectors, matrices, and matrix multiplication.
- Understand the chain rule for backpropagation, gradients, and partial derivatives.
- Familiarity with probability distributions and statistical concepts such as variance, and common loss(e.g., cross-entropy, MSE).
- Proficiency in Python plus experience with numerical and ML libraries like NumPy, TensorFlow, or PyTorch.
- Knowledge of supervised learning, training/validation/test splits, overfitting vs. underfitting, and basic model evaluation metrics.
What Is a Neural Network?
A neural network, often called an artificial neural network (ANN), represents machine learning models drawing their design inspiration from the human brain. This configuration involves several layers of interconnected “neurons” (nodes), processing input data to generate useful results.
Each neuron takes input from the preceding layer, applies weights, and uses an activation function to produce outputs that feed into the next layer. This mechanism enables neural networks to analyze raw data and progressively extract complex features.Neural networks function as programs that detect patterns in data to make predictions and decisions. For example, a trained neural network can analyze an image input to generate a label that identifies the object within it.
Key Components of a Neural Network
To understand how neural networks work, let’s break down their basic components:Layers (Input, Hidden, Output)
Neural networks organize neurons into layers. The input layer of a neural network receives the raw data inputs (e.g., image pixels or dataset features). Hidden layers transform data through weight and activation function processes. The output layer provides the network’s final prediction through outputs like class labels or numerical values.

Neurons and Weights Every neuron operates as a computation unit that takes input, multiplies each by its corresponding weight, sums them, and adds a bias term if applicable. Weights are parameters that determine the importance of each input. The training process involves adjusting these weights to minimize the network’s error rate.

Activation Function Once the weighted sum is computed, the neuron uses an activation function to determine its output. The network requires this non-linear property to learn beyond simple linear relationships. Common activation functions include:

- Sigmoid and tanh transform outputs into ranges between 0 to 1 or -1 to 1.
- ReLU provides 0 for negative inputs and linear values for positive inputs.
- Softmax serves output layers by generating class probabilities.
Output layer neurons provide the final prediction results. The output layer of a classification task consists of multiple neurons, each representing a different class (applying softmax to generate class probabilities). The output layer of a regression task might include a single neuron that produces a continuous value.
How Backpropagation Drives Learning
Training a neural network involves teaching it to perform specific tasks (such as image classification or trend forecasting) through example training data. The learning process commonly follows the following steps:Forward Pass
The network’s input layer receives the input data, which moves through multiple hidden layers to produce the final output. This process is called forward propagation.
Calculate Loss
We assess the network’s output by comparing it to the expected output. Using a loss function (e.g., mean squared error in regression or cross-entropy in classification), we compute the loss, which indicates how much the prediction deviates from the actual result.
Backpropagation
Backpropagation improves the network by adjusting its weights based on the loss. Once the network makes a prediction(during the forward pass), the backpropagation algorithm starts its backward journey to evaluate each weight’s contribution to the error. It then makes small tweaks to reduce that error. We achieve this by applying calculus—specifically, the chain rule—to compute gradients, which guide how each weight should be updated to minimize the loss.

Red dotted arrows show the “backpropagation” (backward pass) from right to left—loss back through output, hidden, and input layers.
Weight Update
The optimization algorithm (e.g., gradient descent or Adam) applies these gradients to adjust weights. The goal of these adjustments is to reduce the prediction error. The optimizer adjusts each weight upwards or downwards to enhance the accuracy of subsequent predictions.
Repeat for Many Iterations The forward-pass and backpropagation steps undergo multiple iterations across the entire dataset. An epoch is defined as a complete pass through the entire training dataset. Training processes typically require multiple epochs. During training sessions, models use separate validation data to track performance metrics and prevent overfitting.
Python Demo: Learn y = 2x with a Single Neuron
This simple Python demonstration guides you through each previous step in an easy-to-understand format:import numpy as np
# Simple backprop for one neuron learning y = 2*x
# 1. Data
x = np.array([1.0, 2.0, 3.0, 4.0])
y = 2 * x # true outputs
# 2. Initialize parameters
w = 0.0 # weight
b = 0.0 # bias
lr = 0.1 # learning rate
print(f"{'Epoch':>5} {'Loss':>8} {'w':>8} {'b':>8}")
print("-" * 33)
# 3. Training loop
for epoch in range(1, 6):
# Forward pass: compute predictions
y_pred = w * x + b
# Compute loss (mean squared error)
loss = np.mean((y_pred - y) ** 2)
# Backward pass: compute gradients
dw = np.mean(2 * (y_pred - y) * x) # ∂Loss/∂w
db = np.mean(2 * (y_pred - y)) # ∂Loss/∂b
# Update parameters
w -= lr * dw
b -= lr * db
# Print progress
print(f"{epoch:5d} {loss:8.4f} {w:8.4f} {b:8.4f}")
Epoch     Loss        w        b
---------------------------------
    1  30.0000   3.0000   1.0000
    2  13.5000   1.0000   0.3000
    3   6.0900   2.3500   0.7400
    4   2.7614   1.4550   0.4170
    5   1.2653   2.0640   0.6061
- Data: We want our neuron to learn y=2x.
- Parameters: w and b are both set to zero.
- Forward pass: Compute your guesses y^=w x+b.
- Loss: We measure the error using mean squared error.
- Backward pass: we compute how much to change w and b by computing their gradients.
- Update: Apply a small adjustment to w and b by multiplying the gradient with the learning rate.
- Repeat: The loss decreases and w gets closer to 2 while b moves toward 0.
How to Train a Neural Network
Though it appears complex, neural network training follows well-defined recipes. We will go through the basic steps to train a neural network:Gather and Prepare Data Choose a dataset that matches your task requirements. Supervised learning tasks require a labeled dataset as input. This could be a labeled dataset for supervised learning (e.g., images with labels, or a spreadsheet of examples). The dataset should be divided into a training set for model learning and a test set for final evaluation. During training, allocate a separate validation set for tuning model parameters. Normalize numerical features and scale pixel values to the [0,1] range, encode categorical labels (e.g. one-hot encoding for multi-class labels), etc. Proper data preparation accelerates network training time and enhances performance.
Choose a Model Architecture
Choose the neural network type and its architecture. How many input features? How many layers and neurons? What activation functions? If you are building a basic classifier, you can start with a feed-forward network that contains one or two hidden layers. You can choose CNNs for image processing, whereas RNNs are better suited for handling text or time-series data.
Initialize Weights and Biases
Neural network libraries handle this process, but initial weights are set to small random values. The random values break symmetry between neurons to prevent identical learning patterns. These values are typically generated from suitable distributions like Gaussian or uniform, depending on the type of layer. Setting all initial weights to zero is not recommended, as it hinders effective training.
Select a Loss Function and Optimizer
Choose a loss function that fits your specific task requirements. You can use cross-entropy loss when performing classification tasks and mean squared error for regression tasks. Then choose the optimizer. It is the algorithm responsible for updating weights to reduce the loss. Stochastic Gradient Descent and Adam remain the top selections among other optimizers. You will need to configure hyperparameters such as the learning rate, which determines the size of weight updates, and the batch size, which indicates how many examples are processed during each forward/backpropagation pass.
Forward Pass
The framework manages the batch of training through the network. Current network weights determine the outputs/predictions produced by the network.
Calculate Loss
This involves comparing the network’s outputs against the true target values for that batch.
Backward Pass (Backpropagation) During backpropagation, the framework computes how the loss changes with respect to each weight in the network.
Update Weights The optimizer adjusts the weights and biases using the computed gradients. For example, SGD updates each weight by subtracting the product of the learning rate and the gradient from the current weight value. This completes one training iteration for that batch.
Repeat for Many Iterations Keep inputting new data batches and repeatedly perform forward and backward propagation. The loss value should typically decrease over time. The validation set performance should be tracked to identify potential overfitting.
Tune Hyperparameters as Needed
If the model struggles to learn effectively, consider adjusting the learning rate, testing other optimizers, and increasing the number of neurons or layer depth.
Evaluate the Test Set Once you’ve completed sufficient training epochs or if validation performance stops improving, evaluate the finalized model using the hold-out test set. Testing the final model on the hold-out test set provides an unbiased estimate of its performance on new, unseen data.
Training a Neural Network on MNIST (Handwritten Digits)
To illustrate the training process, we will build a basic feed-forward neural network using the MNIST dataset. The following steps will adhere to the training process described previously:Load and preprocess data
We start by loading the MNIST dataset and reshaping each 28x28 pixel image into a 784-dimensional vector. We improve training efficiency by scaling pixel values from the range 0-255 to 0-1. Then we partitioned the dataset into separate training and test sets.
import tensorflow as tf
from tensorflow.keras import layers

# Load MNIST dataset
(x_train, y_train), (x_test, y_test) = tf.keras.datasets.mnist.load_data()

# Preprocess: flatten 28x28 images to 1D, normalize pixel values
x_train = x_train.reshape(-1, 784).astype("float32") / 255.0
x_test  = x_test.reshape(-1, 784).astype("float32") / 255.0
We choose a network architecture. Our network architecture starts with 784 input values that move through a neural layer with 128 neurons using ReLU activation. The network ends with an output layer with 10 neurons and utilizes Softmax activation. This setup produces a probability distribution across the ten digit classes.
# Define a simple feed-forward neural network
model = tf.keras.Sequential([
    layers.Dense(128, activation='relu', input_shape=(784,)),  # hidden layer
    layers.Dense(10, activation='softmax')                     # output layer for 10 classes
])
We’ll choose an appropriate loss function, such as SparseCategoricalCrossentropy, which works well with integer labels or one-hot encoded labels used with Softmax outputs. We can apply the Adam optimizer, a well-known gradient descent variant. We will also track accuracy as a metric.
model.compile(optimizer='adam',
              loss='sparse_categorical_crossentropy',
              metrics=['accuracy'])
The fit function allows us to train the model for a fixed number of epochs(e.g. 5) while using a batch size (e.g., 32). We can provide a validation_split parameter of 0.1 to monitor validation accuracy during model training or use a distinct validation dataset.
# Train the model for 5 epochs
model.fit(x_train, y_train, epochs=5, batch_size=32, validation_split=0.1)
After training, we evaluate the model against the test set to assess its performance on unseen data.
# Evaluate on test data
test_loss, test_acc = model.evaluate(x_test, y_test)
print(f"Test accuracy: {test_acc:.4f}")
Solving the XOR Problem
We will explore how solving the traditional XOR problem demonstrates these fundamental principles. The XOR operation returns 1 if its two binary inputs are different (for instance, 0 XOR 1 produces 1). However, it returns 0 if both binary inputs are identical (such as 1 XOR 1 results in 0). The XOR problem cannot be solved by a single-layer perceptron because it’s not linearly separable. However, an artificial neural network featuring one hidden layer can learn the XOR function.In the following code, we will train a basic neural network using the XOR truth table. We will build a neural network using TensorFlow/Keras, which consists of 2 input neurons, a hidden layer with 2 neurons, and 1 output neuron.
import numpy as np
from tensorflow import keras
from tensorflow.keras import layers

# XOR input and outputs
X = np.array([[0,0],[0,1],[1,0],[1,1]], dtype="float32")
y = np.array([0, 1, 1, 0], dtype="float32")

# Define a simple 2-2-1 neural network
model = keras.Sequential([
    layers.Dense(2, activation='relu', input_shape=(2,)),   # hidden layer with 2 neurons
    layers.Dense(1, activation='sigmoid')                   # output layer with 1 neuron
])
model.compile(optimizer='adam', loss='binary_crossentropy', metrics=['accuracy'])

# Train the model
model.fit(X, y, epochs=1000, verbose=0)  # train for 1000 epochs

# Test the model
preds = model.predict(X).round()
print("Predictions:", preds.flatten())
Explore our tutorial on constructing neural networks from scratch to see how to implement an XOR-solving network using NumPy while thoroughly explaining the mathematical principles involved.
Types of Neural Networks (FFNN vs. CNN vs. RNN)
Neural networks come in various architectures, each suited to different kinds of data:| Neural Network Type | Characteristics & Structure | Common Applications |
|---|---|---|
| Feed-Forward Neural Network (FFNN) | Neurons in a network are structured into fully-connected layers, and information moves unidirectionally from input toward output without any loops. The networks lack any built-in mechanism to interpret the order or spatial structure of data. | Structured data (tabular) classification/regression Basic pattern recognition tasks |
| Convolutional Neural Network (CNN) | Incorporates convolutional layers that apply filters over local regions of the input (e.g., image patches) to extract spatial features. Typically includes pooling layers for downsampling and fully-connected layers for final classification. Some architectures use global pooling layers instead of final fully-connected layers to reduce each feature map to a single value. | Image and video analysis (computer vision) Object detection and facial recognition Any tasks involving grid-like data (images, etc.) |
| Recurrent Neural Network including LSTM, GRU & Feedback Networks | Recurrent Neural Networks process sequential data using connections that create feedback loops to maintain information across time steps. LSTM and GRU variants can learn long-term dependencies in sequence data. | Time-series forecasting (e.g., stock prices, weather) in Python Natural language processing (text generation, translation) |
Common Training Pitfalls and How to Avoid Them
Training neural networks can be challenging. Here are some common issues and tips for avoiding them:| Training Pitfall | Description | How to Avoid |
|---|---|---|
| Overfitting | The model memorizes training data, including noise, which leads to excellent training accuracy but low validation/test accuracy. | Apply regularization (e.g., dropout, weight decay) Use early stopping based on validation loss Increase the dataset size or use data augmentation |
| Underfitting | Due to its simplicity and insufficient training duration, the model fails to identify core patterns, resulting in poor performance on training and test sets. | Increase model capacity (more layers or neurons) Train for more epochs Reduce regularization strength |
| Poor Hyperparameter Selection | Inappropriate settings for hyperparameters like learning rate, batch size, etc., may lead to training processes that diverge, oscillate, or learn too slowly. | Perform systematic tuning of hyperparameters such as learning rate, batch size, and model architecture. Use validation data to evaluate each configuration Consider automated search techniques such as grid search, random search, and Bayesian optimization. |
Popular Tools and Libraries for Neural Networks
Modern frameworks simplify the process of building and training neural networks. Novice and experienced professionals can find these popular tools useful:- TensorFlow (with Keras): It is an open-source library from Google. Keras is integrated with TensorFlow to offer beginner-friendly tools for defining and training machine learning models.
- PyTorch: Meta (Facebook) developed PyTorch, which provides dynamic computation graphs and a Pythonic style. It is widely used across research fields and industry applications.
- Scikit-learn: A general machine learning library in Python. It features basic neural network models such as MLPClassifier, which work well for small-scale problems or as a starting point.
- Others: We can include frameworks like MXNet, Caffe, Microsoft CNTK, and high-level tools like FastAI or Hugging Face Transformers.
FAQ SECTION
What is the difference between a neural network and deep learning?A Neural network is a computational model that draws inspiration from the structure of the human brain and consists of connected layers of nodes that process data.
Deep learning represents a specialized area within machine learning that leverages deep neural networks composed of multiple layers to learn complex patterns from large datasets.
Can I train a neural network without code?
Yes—Users can perform simple classification tasks without writing code through platforms such as Google Teachable Machine and Azure ML, which offer no-code interfaces.
How long does it take to train a neural network?
The time required for training depends on factors such as the data size, model complexity, and the type of hardware used (CPU vs. GPU/TPU).
What tools do I need to train a neural network?
To train a neural network, you require Python 3, a deep-learning library such as TensorFlow or PyTorch, and ideally a CUDA-enabled GPU for optimal speed.
What is backpropagation in simple terms?
Backpropagation is like adjusting every knob in a sound mixer after hearing noise. The algorithm computes each weight’s contribution to the error before adjusting weights to minimize loss.
Conclusion
In summary, neural networks offer a powerful, brain‐inspired approach to pattern recognition and decision-making.
They use simple computation units (neurons), which they organize into layers and adjust connections through iterative backpropagation and optimization algorithms to extract complex features from data.
Whether working on simple problems such as XOR or complex tasks like handwritten digit recognition, successful model design depends on understanding the role of layers, activation functions, loss functions, and optimizers.
By exploring various neural network architectures(such as feed-forward, convolutional, and recurrent models) and avoiding common issues like overfitting and suboptimal hyperparameter selections, you will develop the intuition and expertise needed to apply deep learning to practical problems."Shaoni Mukherjee" / 2025-06-20 a month ago / 未收藏/ DigitalOcean Community Tutorials/
发送到 kindle
Introduction
In today’s fast-moving world of AI, one big goal is to build models that can handle everything—reading text, looking at images, listening to audio, and even watching videos—all at once. These are called unified multimodal models, and they’re becoming more important than ever.Ming-lite-omni represents a major step forward in this direction. As a lightweight yet highly capable multimodal model, Ming-lite-omni not only supports perception across text, images, audio, and video, but also excels in generating speech and images—all within a compact 2.8 billion parameter framework.
What is Ming-lite-omni?
Ming-lite-omni is a distilled version of Ming-omni, building upon Ling-lite and leveraging Ling, a Mixture of Experts (MoE) architecture enhanced with modality-specific routers. This design allows the model to process input from multiple modalities via dedicated encoders and unify them through a shared representation space. Unlike many prior models that require task-specific fine-tuning or architecture adjustments, Ming-lite-omni processes and fuses multimodal inputs within a single, cohesive framework.Importantly, Ming-lite-omni goes beyond traditional perception—it includes generation capabilities for both speech and images. This is enabled by an advanced audio decoder and the integration of Ming-Lite-Uni, a robust image generation module. The result is a highly interactive, context-aware AI that can chat, perform text-to-speech conversion, and carry out sophisticated image editing tasks.
Key Features at a Glance
- Unified Omni-Modality Perception: Ming-lite-omni is built on Ling’s smart MoE system and uses special routers to handle different types of input—like text, images, and audio—without mixing them up. Everything works smoothly, no matter the task.
- Unified Perception and Generation: It can take in a mix of things like text, images, or sounds, understand them together, and respond in a clear and connected way. This makes it easier for users to interact with and improves how well it performs.
- Innovative Cross-Modal Generation: Ming-lite-omni can speak in real time and create high-quality images. It does a great job at understanding pictures, following instructions, and even having conversations that combine sound and visuals.
Evaluation and Performance
Despite activating only 2.8 billion parameters, Ming-lite-omni delivers results on par with or better than much larger models. On image perception tasks, it performs comparably to Qwen2.5-VL-7B. For end-to-end speech understanding and instruction following, it outpaces Qwen2.5-Omni and Kimi-Audio. In image generation, it achieves a GenEval score of 0.64, outperforming leading models like SDXL, and reaches a Fréchet Inception Distance (FID) score of 4.85, setting a new state of the art.
Open Source and Community Impact
Perhaps one of the most exciting aspects of Ming-lite-omni is its openness. All code and model weights are publicly available, making it the first open-source model comparable to GPT-4o in modality support. Researchers and developers now have access to a powerful, unified multimodal tool that can serve as a foundation for further innovation in AI-driven audio-visual.Ming-lite-omni is already making waves in the open-source AI community. Its compact design, advanced capabilities, and accessible implementation make it a landmark release in the realm of multimodal generative AI.
Conclusion
Ming-lite-omni shows just how far multimodal AI has come, bringing together language, visuals, and sound in one compact, open-source model. It’s exciting to see a model that doesn’t just understand different types of input but also creates high-quality speech and images with ease. Its ability to perform so well with fewer parameters makes it a strong choice for both researchers and developers looking for efficiency without sacrificing capability."Crossley McEwen" / 2025-06-18 a month ago / 未收藏/ Elasticsearch/
发送到 kindle
Since the release of the Defence Data Management Strategy in 2020,1 significant strides have been made toward the MOD's vision of treating data as a “strategic asset, second only to people.” Yet, as the 2025 target date approaches, work remains to achieve the strategy's four key outcomes:
CISOs in defence are faced with the question: How do we put a security wrap around AI to understand how it is being used and what data it is accessing?
Elastic meets the strategic outcomes of the MOD data strategyIn the Defence Data Strategy, the rules and outcomes play complementary roles. The Defence Data Rules set the principles and standards required to build a unified data environment, while the strategic outcomes define the goals Defence aims to achieve through their application. Together, the rules provide the foundation, and the outcomes set the direction — driving the operational transformation of Defence’s data landscape.
Elastic helps Defence overcome data silos and complexity, transforming strategic goals into mission success. Here’s how Elastic enables each Defence data outcome in practice:
Join our webinar series, Mission advantage: Strategic conversations with defence leaders to explore how defence organisations are embedding governance, auditability, and assurance into every phase of AI deployment — while building a unified data layer to drive mission success and accelerate Defence Data Strategy outcomes.
Explore additional resources:
Sources:
The release and timing of any features or functionality described in this post remain at Elastic's sole discretion. Any features or functionality not currently available may not be delivered on time or at all.
In this blog post, we may have used or referred to third party generative AI tools, which are owned and operated by their respective owners. Elastic does not have any control over the third party tools and we have no responsibility or liability for their content, operation or use, nor for any loss or damage that may arise from your use of such tools. Please exercise caution when using AI tools with personal, sensitive or confidential information. Any data you submit may be used for AI training or other purposes. There is no guarantee that information you provide will be kept secure or confidential. You should familiarize yourself with the privacy practices and terms of use of any generative AI tools prior to use.
Elastic, Elasticsearch, and associated marks are trademarks, logos or registered trademarks of Elasticsearch N.V. in the United States and other countries. All other company and product names are trademarks, logos or registered trademarks of their respective owners.
- Curating integrated, machine-ready data
- Treating data as a strategic asset
- Developing skilled personnel to leverage information advantages
- Positioning Defence as data leaders alongside partners and allies
CISOs in defence are faced with the question: How do we put a security wrap around AI to understand how it is being used and what data it is accessing?
Elastic meets the strategic outcomes of the MOD data strategyIn the Defence Data Strategy, the rules and outcomes play complementary roles. The Defence Data Rules set the principles and standards required to build a unified data environment, while the strategic outcomes define the goals Defence aims to achieve through their application. Together, the rules provide the foundation, and the outcomes set the direction — driving the operational transformation of Defence’s data landscape.
Elastic helps Defence overcome data silos and complexity, transforming strategic goals into mission success. Here’s how Elastic enables each Defence data outcome in practice:
- Data is curated, integrated, and human/machine-ready: Data can be searched and understood in its original format without needing to be converted first. This means different types of information, like intelligence feeds, sensor readings, and operation records, can be analysed and accessed holistically, no matter where they come from.
- Data is treated as a strategic asset: RBAC and ABAC enforce data sovereignty by granting authorised personnel granular access to accurate, up-to-date data for real-time decisions. RBAC simplifies privilege management by tying permissions to roles, removing access automatically when roles change — especially when integrated with systems like Active Directory.
- Skilled personnel exploiting data for advantage: User-friendly dashboards let analysts identify trends and anomalies without specialised expertise. Generative AI integration summarises complex unstructured data, while prebuilt templates and workflows accelerate training. This addresses skills gaps and maximises the effectiveness of existing personnel, which can significantly increase security teams' efficiency.
- Defence as data leaders with partners and allies: An open, flexible ecosystem with multi-vendor support allows Defence to unify data and drive innovation collaboratively with partners and industry, ensuring agile and secure operations.
Join our webinar series, Mission advantage: Strategic conversations with defence leaders to explore how defence organisations are embedding governance, auditability, and assurance into every phase of AI deployment — while building a unified data layer to drive mission success and accelerate Defence Data Strategy outcomes.
Explore additional resources:
- How Elastic can help organizations achieve CMMC compliance
- Data compliance in public sector: Making data secure and accessible isn’t mutually exclusive
- What the public sector can learn from CDM’s data strategy
- M-21-31 logging compliance: Where are we now?
Sources:
- Computer Weekly, “Government announces data strategy for defence,” 2021.
- Ministry of Defence, “Data Strategy for Defence - GOV.UK,” 2021.
The release and timing of any features or functionality described in this post remain at Elastic's sole discretion. Any features or functionality not currently available may not be delivered on time or at all.
In this blog post, we may have used or referred to third party generative AI tools, which are owned and operated by their respective owners. Elastic does not have any control over the third party tools and we have no responsibility or liability for their content, operation or use, nor for any loss or damage that may arise from your use of such tools. Please exercise caution when using AI tools with personal, sensitive or confidential information. Any data you submit may be used for AI training or other purposes. There is no guarantee that information you provide will be kept secure or confidential. You should familiarize yourself with the privacy practices and terms of use of any generative AI tools prior to use.
Elastic, Elasticsearch, and associated marks are trademarks, logos or registered trademarks of Elasticsearch N.V. in the United States and other countries. All other company and product names are trademarks, logos or registered trademarks of their respective owners.
"Andrea Griffiths" / 2025-06-20 a month ago / 未收藏/ The GitHub Blog/
发送到 kindle
When generative AI tools guess what you need, the magic only lasts as long as the guesses are right. Add an unfamiliar codebase, a security checklist your team keeps in a wiki, or a one‑off Slack thread that explains why something matters, and even the most and even the most powerful model may fill in gaps with assumptions rather than having access to your specific context and knowledge.
GitHub Copilot Spaces fixes that problem by letting you bundle the exact context Copilot should read—code, docs, transcripts, sample queries, you name it—into a reusable “space.” Once a space is created, every Copilot chat, completion, or command is grounded in that curated knowledge, producing answers that feel like they came from your organization’s resident expert instead of a generic model.
In this article, we’ll walk through:
Spaces are available to anyone with a Copilot license (Free, Individual, Business, or Enterprise) while the feature is in public preview. Admins can enable it under Settings > Copilot > Preview features.
TL;DR: A space is like pinning your team’s collective brain to the Copilot sidebar and letting everyone query it in plain language.
The post GitHub Copilot Spaces: Bring the right context to every suggestion appeared first on The GitHub Blog.
GitHub Copilot Spaces fixes that problem by letting you bundle the exact context Copilot should read—code, docs, transcripts, sample queries, you name it—into a reusable “space.” Once a space is created, every Copilot chat, completion, or command is grounded in that curated knowledge, producing answers that feel like they came from your organization’s resident expert instead of a generic model.
In this article, we’ll walk through:
- A 5‑minute quick‑start guide to creating your first space
- Tips for personalizing Copilot’s tone, style, and conventions with custom instructions
- Real‑world recipes for accessibility, data queries, and onboarding
- Collaboration, security, and what’s next on the roadmap (spoiler: IDE integration and Issues/PR support)
Why context is the new bottleneck for AI‑assisted development
Large language models (LLMs) thrive on patterns, but day‑to‑day engineering work is full of unpatterned edge cases, including:- A monorepo that mixes modern React with legacy jQuery
- Organizational wisdom buried in Slack threads or internal wikis
- Organization‑specific security guidelines that differ from upstream OSS docs
What exactly is a Copilot Space?
Think of a space as a secure, shareable container of knowledge plus behavioral instructions:| What it holds | Why it matters | |
|---|---|---|
| Attachments | Code files, entire folders, Markdown docs, transcripts, or any plain text you add | Gives Copilot the ground truth for answers |
| Custom instructions | Short system prompts to set tone, coding style, or reviewer expectations | Lets Copilot match your house rules |
| Sharing & permissions | Follows the same role/visibility model you already use on GitHub | No new access control lists to manage |
| Live updates | Files stay in sync with the branch you referenced | Your space stays up to date with your codebase |
Spaces are available to anyone with a Copilot license (Free, Individual, Business, or Enterprise) while the feature is in public preview. Admins can enable it under Settings > Copilot > Preview features.
TL;DR: A space is like pinning your team’s collective brain to the Copilot sidebar and letting everyone query it in plain language.
Quick-start guide: How to build your first space in 5 minutes
- Navigate to github.com/copilot/spaces and click Create space.
- Name it clearly. For example,
frontend‑styleguide. - Add a description so teammates know when—and when not—to use it.
- Attach context:
- From repos: Pull in folders like
src/componentsor individual files such aseslint.config.js. - Free‑text hack: Paste a Slack thread, video transcript, onboarding checklist, or even a JSON schema into the Text tab. Copilot treats it like any other attachment.
- Write custom instructions. A sentence or two is enough:
- “Respond as a senior React reviewer. Enforce our ESLint rules and tailwind class naming conventions.”
- Save and test it. You’re done. Ask Copilot a question in the Space chat—e.g., “Refactor this
<Button>component to match our accessibility checklist”—and watch it cite files you just attached.
Personalize Copilot’s coding style (and voice, too)
Custom instructions are the “personality layer” of a space and where spaces shine because they live alongside the attachments. This allows you to do powerful things with a single sentence, including:- Enforce conventions
- “Always prefer Vue 3
script setupsyntax and Composition API for examples.”
- “Always prefer Vue 3
- Adopt a team tone
- “Answer concisely. Include a one‑line summary before code blocks.”
- Teach Copilot project‑specific vocabulary
- “Call it ‘scenario ID’ (SCID), not test case ID.”
Automate your workflow: three real‑world recipes
1. Accessibility compliance assistant
Space ingredients- Markdown docs on WCAG criteria and GitHub’s internal “Definition of Done”
- Custom instruction: “When answering, cite the doc section and provide a code diff if changes are required.”
2. Data‑query helper for complex schemas
Space ingredients- YAML schema files for 40+ event tables
- Example KQL snippets saved as
.sqlfiles - Instruction: “Generate KQL only, no prose explanations unless asked.”
3. Onboarding Hub and knowledge base in one link
Space ingredients- Key architecture diagrams exported as SVG text
- ADRs and design docs from multiple repos
- Custom instruction: “Answer like a mentor during onboarding; link to deeper docs.”
main, updates to ADRs propagate automatically—no stale wikis.Collaboration that feels native to GitHub
Spaces respect the same permission model you already use:- Personal spaces: visible only to you unless shared
- Organization‑owned spaces: use repo or team permissions to gate access
- Read‑only vs. edit‑capable: let SMEs maintain the canon while everyone else consumes
What’s next for Copilot Spaces?
We’re working to bring Copilot Spaces to more of your workflows, and are currently developing:- Issues and PR attachments to bring inline discussions and review notes into the same context bundle.
- IDE Integration: Query Spaces in VS Code for tasks like writing tests to match your team’s patterns.
- Org‑wide discoverability to help you browse spaces like you browse repos today, so new engineers can search “Payments SME” and start chatting.
Get started today
Head to github.com/copilot/spaces, spin up your first space, and let us know how it streamlines your workflow. Here’s how to get it fully set up on your end:- Flip the preview toggle: Settings > Copilot > Preview features > Enable Copilot Spaces.
- Create one small, high‑impact space—maybe your team’s code‑review checklist or a set of common data queries.
- Share the link in Slack or a README and watch the pings to subject‑matter experts drop.
- Iterate: prune unused attachments, refine instructions, or split a giant space into smaller ones.
The post GitHub Copilot Spaces: Bring the right context to every suggestion appeared first on The GitHub Blog.
"techug" / 2025-06-19 a month ago / 未收藏/ 程序师/
发送到 kindle
为什么要花时间研究这个在当今几乎不再使用的 90 年代算法?问题是,许多协议和库仍需支持 bzip2 以符合其规范,因此许多项目在依赖树的深层仍依赖于 bzip2。我们利用在 zlib-rs 中的经验对 bzip2 实现进行了现代化改造。
"techug" / 2025-06-19 a month ago / 未收藏/ 程序师/
发送到 kindle
此更改仅修改了在序列化过程中将 HTML 片段转换回字符串表示的方式。影响仅限于访问 innerHTML 或 outerHTML 属性或对元素调用 getHTML() 方法的情况。这些操作会采用现有的 DOM 结构,并生成文本 HTML 表示法。
"techug" / 2025-06-19 a month ago / 未收藏/ 程序师/
发送到 kindle
Java25和Java8
"techug" / 2025-06-20 a month ago / 未收藏/ 程序师/
发送到 kindle
学习Vim不仅仅是选择一个新的编辑器,更是改变你与代码互动的方式。我认为每位开发者都应该尝试一下Vim,看看它是否适合自己。如果你坚持下去,Vim会让你获得一种难以言喻的控制感和流畅性,直到你亲身体验才会明白。
"techug" / 2025-06-20 a month ago / 未收藏/ 程序师/
发送到 kindle
HCL已经是Terraform的格式,所以至少我们只需要讨厌一种配置语言,而不是两种。它具有强类型和显式类型。已经有了良好的验证机制。它专门设计用于完成我们要求YAML完成的任务,而且阅读起来并不困难
"v_JULY_v" / 2025-06-19 a month ago / 未收藏/ 结构之法 算法之道/
发送到 kindle
《KungfuBot:基于物理的人形机器人全身控制方法解析》 摘要:本文介绍了最新开源的人形机器人控制框架KungfuBot,该研究由中国电信、上海交大等多所高校联合提出。该系统采用两阶段方法实现高动态动作模仿:首先通过物理指标筛选可行的人类动作数据,随后通过自适应运动跟踪机制训练控制策略。创新性地引入双层优化算法动态调整跟踪因子,并设计非对称的actor-critic架构提升训练效率。相比现有方法,KungfuBot能更好地处理敏捷动作,且仅需少量参考数据即可学习多样化行为。研究团队已完整开源项目代码,为
"hello@smashingmagazine.com (Victor Ayomipo)" / 2025-06-19 a month ago / 未收藏/ smashingmagazine/
发送到 kindle
CSS can be unpredictable — and specificity is often the culprit. Victor Ayomipo breaks down how and why your styles might not behave as expected, and why understanding specificity is better than relying on `!important`.